Posts Tagged With: DIY

What to Expect from the Lazy Homesteader in 2013

I’ve thought pretty hard about the “resolutions” I want to share on the blog for this year.  I’ve had a hard time thinking of specific goals, and I’m not really into the “lose twenty pounds” type of resolutions.  I’ve decided that instead of goals I wanted to focus on some themes that are both personal to me and yet very applicable to the homesteading way of life.

This year, you can expect to see posts (hopefully weekly, realistically a couple of times a month) having to do with one or two of the following themes.

Rick hikng with C on his backCommunity – In 2012, I established a monthly potluck to help build community.  I made some new friends and built connections.  In 2013 I want to do this more.  I want more connection, more real relationships.  I have realized that no one can live this life alone.  We need each other and I want more of it.  I have a challenge in mind for this theme this year.  I’m excited about it, though it’s going to be a tough one.

Preparedness – Colorado had the worst wild-fire of all time in 2012.  There were hurricanes on the East coast.  For much of the country, there were record heat waves and drought.  Across the country there were poor harvest and food prices are on the rise.  I’m not a panicky or prepper or anything like that, but I have started thinking about the benefits of being prepared in a real emergency.

Thrift – Expect to see more DIY posts this year.  From homemade to making-do to doing without, I plan to share more thrifty ideas this year.

Food Connections – This is the thing that sent me down the homesteading path all those years ago; being connected to our food.  I have plans to share about sustainable food sources, processing your own meat (including wild game and hunting), and of course the garden.  This year I am going to explore as many aspects of food connection as I can.  I hope to close some of the gaps we’ve had in our own food sources as well.

Grace – This year I plan to go easier on myself.  You guys know I love a crazy goal.  But I also need a little more balance, and my kids certainly need a sane mommy.  So I plan to cut myself a little slack this year.  I’ve realized that this journey to being green and crunchy and self-sufficient is just that, a journey.  I don’t have to do it all at once.  It’s ok to take small steps and find what is feasible for our family.  I’m not throwing the baby out with the grey water or anything, but I am going to focus more on things like simplicity, peace, and well, the categories mentioned above.  🙂

I’m really looking forward to 2013 and what it will bring.  And I’m excited to share our homestead with you as always.

Categories: Community, DIY, Simple Living, Thrift, Top 5, Urban Homesteading | Tags: , , , , , , | 4 Comments

Ax Skills for the Homestead & Wilderness DVD Winner

Drawn by a random number generator….. Cass is the winner!  I will email you, Cass, with instructions on how to get your DVD.

If you didn’t win, make sure you visit oldfedco.com and order a copy for yourself.   Thanks again to Alex and Old Federal Ax Co. for this awesome giveaway!

Categories: DIY, Giveaways, Simple Living, Urban Homesteading | Tags: , , , | 1 Comment

Bathroom Redo or How I Made Peace with Pink Tile

Over the last few years, we’ve slowly updated things in our old, dated bathroom.  A new light fixture here, a sink faucet there, new door pulls on the vanity.  That sort of thing.  We never were ready to shell out significant dough to redo the bathroom.  But over the last few weeks, we’ve managed to give the place a fairly major facelift for under $700.

It started off the way most of our projects do; with a “really easy” change.  I wanted to change out the old tub faucet and handles from who knows when (the 40’s maybe?) to some that were NOT corroded, actually turned and had a diverter that didn’t leak.  And, I wanted to replace the towel bar with a rack of five hooks (since we have five people that use the bathroom).  Two really easy things, right?

Except it took TEN trips to various hardware stores to find some handles that fit our tub.  No joke.

Only the faucet/diverter and the handles themselves are new.  The plate is original(?) and could not be replaced.  We just cleaned as much corrosion off of it as possible and searched and searched and went on an epic quest until we found handles that fit.

But the shiny new chrome made the recessed soap dish look so bad.  And, well, the painted tub from some prior refinishing job has been peeling for almost nine years now.  So…. we finally broke open the piggy bank and dove in.

We literally had to rip out the soap dish.

And when we did, we were unsurprised (but discouraged) to find wet wall board.

So after two days of drying it out, Rick cut away what couldn’t be saved and patched the hole.  And I re-tiled and re-grouted with tiles we found in the crawl space that matched (thank the good Lord for that find!).

It looks bad, but it was only nine tiles.  I was also replacing some loose and missing grout.  What do you think of all that pink tile?

While the grout dried, we started in with the paint.  Rick sanded the window frame and sill and I gave it a few new coats of paint.

It’s no secret that pink tile was never a dream choice of mine.  So when we moved in, I painted the bathroom blue to match my blue towels and held onto the hope that one day, we’d replace the tile.

Here is the original wall color under my old towel bar  (look pink grout lines on the floor too!).

And here is the old storage for the other various bathroom items:

And this is the new version:

All those containers were just sitting around the house.  Yay for free!

I finally wised up and realized we were not going to be replacing that pink tile anytime in the near future.  Besides, it is cheaper to buy new towels.   So we painted this sandy-cream color and installed my hooks.

And got a nice fluffy, girly rug to match my pink grout lines.

Don’t worry, I have a solid tan one that I can swap out.  I do have two little boys after all.

So, what about the horrid peeling tub?  You just know that baby was originally pink, right.

Well, here is the before in all its pink and white glory:

And here it is now:

I can’t even believe the difference.  It’s so amazing.

But it’s not even my favorite part.

Here is the only before picture I could find showing how the pink tile extends out of the tub/shower area to behind the toilet and sink all along the wall.  In it, you can also notice, just barely there, at Rick’s elbow, the old faucet handle.  And some random piece of hardware screwed into the shower wall, half-way up.  And, of course, blue paint and towels.

Here is the after shot.

With the new paint job, the girly bird-motif hand towels, and my planned chocolate brown bath towels, my bathroom actually looks good in pink.

I truly can’t decide which I’m more pleased with; the paint/towel/tile combo or the shiny new tub finish.  But either way, I’m one happy camper.

Oh, did I mention this is our only bathroom?

Yeah.  It was about time.

Categories: DIY | Tags: , , | 15 Comments

Bee Birthday and Easy Mason Jar Drink Lids (with Tutorial)

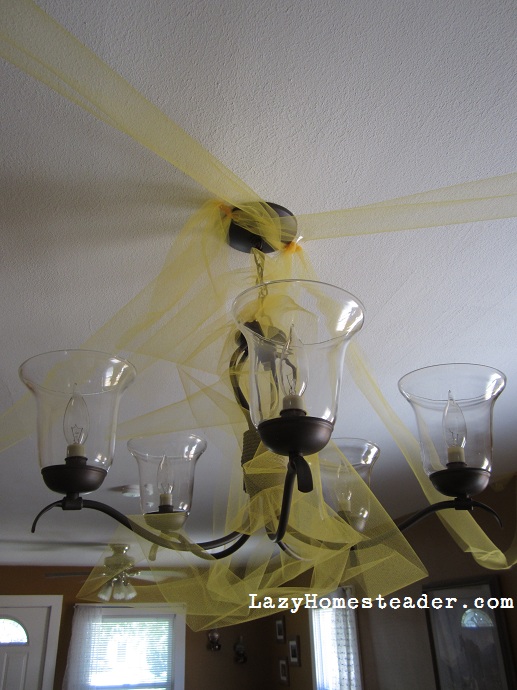
This weekend we celebrated C’s first birthday.  I ordered cupcakes from a wonderful, local, all- organic bakery that makes a to-die-for flavor called “Bee-titude.”  It’s a lavender cupcake with honey-lemon butter cream frosting, and it was the inspiration for C’s party theme: honey bee.  The party colors were yellow and lavender, and it turns out that this was a really fun theme to put together.

I also made a few discoveries for decorating this party that eased the green-guilt that sometimes comes along with me decorating.  I found spools of colored tulle at the craft store that I can easily roll up and reuse for another occasion instead of the crêpe paper streamers I usually use.  And I bought two yards of inexpensive broadcloth for the table-cloth that would match the party theme.

I used various glass plates and jars to decorate and filled a vase with lavender and chamomile flowers.

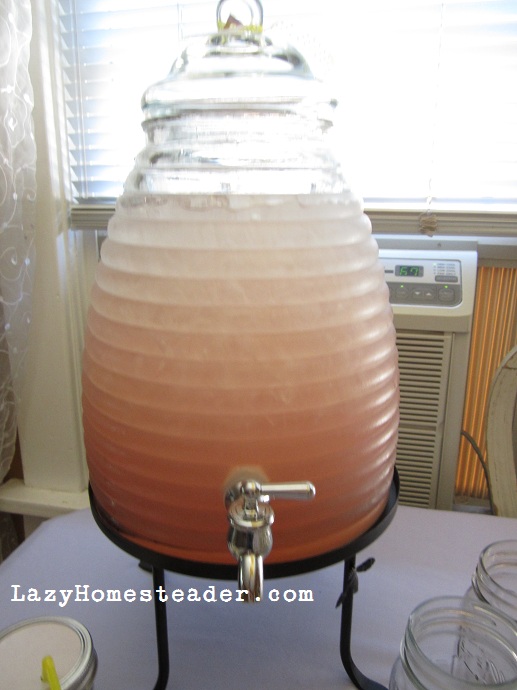
I have a gorgeous bee skep-shaped drink dispenser that my mom bought me for Christmas last year and I filled it with honey-lavender lemonade.  I was surprised that the lavender flowers turned the lemonade pink!

And I used my canning jars as glasses.  Pints for the adults with ribbons and tags to write names on, and half-pints with lids for the kids.  And here was my eureka moment.  Ball jelly jars are durable and their lids don’t leak.  And I used a HOLE-PUNCH to make them into drink lids.

Here’s how:

First I traced old jar lids onto patterned paper and then cut out the circles.

I used double-sided tape to stick the paper to the top of the lid.

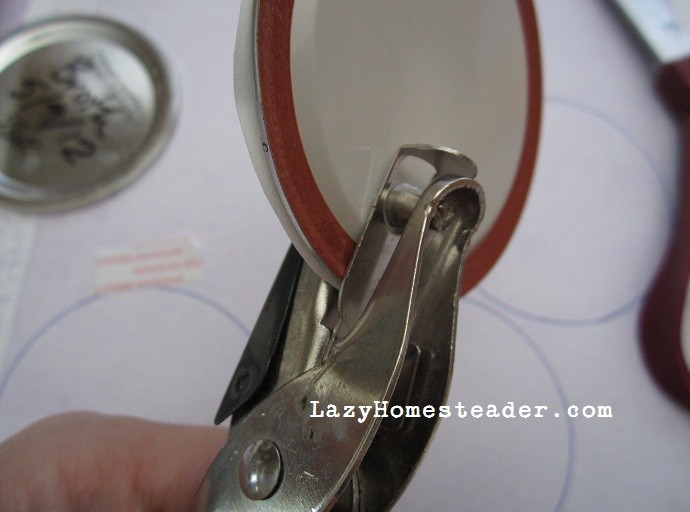
Then I used a regular old hole-punch to punch holes in the tops of the lids.  This was surprisingly easy.  I did it with one hand and minimal effort.  The punch still worked great on about twenty paper tags after punching six lids.

I used a cheapy plastic straws with about an inch cut off the end to make the kids’ tumblers complete.

Not a single jar got broken between six, three- to seven-year-olds.  They even took them outside.  I wrote each kiddo’s name on the top of their jar, so there were no mix-ups.  It was really easy and completely free, since I had all these supplies lying around the house.  Henry even helped cut out the circles.

I plan to just swap out the paper circles and straws for the next party.

Categories: DIY, Simple Living, Thrift | Tags: , , , , , , | 15 Comments

Handmade Halloween – No Sew Pterodactyl Tutorial

Last year I posted two Halloween costume tutorials and they were a big hit.  In fact, they’ve been the biggest hits on this blog for the last month or so.  But last year, the costumes were easy.  E was a garden gnome, and H was a bat.  This year, H upped the ante – he wants to be a pterodactyl.

A pterodactyl.  Seriously.  How am I supposed to make that?!  H certainly keeps me on my toes.  Here’s what we came up with.

You’ll need:

  • a large piece of poster board
  • approx. one yard of fleece fabric (or an amount that will fit your kid’s arm-span)
  • hot glue gun and glue
  • scissors and hole-punch
  • duct tape, preferably in a fun color
  • five 9″x12″ pieces of felt in a variety of colors.  I used 2 red pieces, 2 orange pieces and 1 yellow piece.  These are not pictured.
  • a helper who wants to be a pterodactyl

Originally I was going to use spray paint to decorate the costume, but after trying it on some scraps, I decided to go with felt instead.  Just disregard that can of paint there.  😉

So, the Ptutorial:

Roll the poster board into a cone shape, centering the bottom point over your kiddos eyes and making sure he can still see.  Tape the cone so that it will be the correct size to fit his head.  This will be sort of a hat.  A cone-hat.  It’s ok if there is a little wiggle room, since you will be making ties that will be on the inside of the cone-hat.


Punch two holes in the cone-hat near your kid’s ears, using duct tape to reinforce them (the holes, not the ears).  Keep in mind that the back of the cone-hat is heavy, so the holes will need to be in a place that will keep it balanced on his head.  Also keep in mind that he has hair under the cone-hat where you are punching the holes – unless you want to give him a weird hole-punch hair cut.  Yep, that’s the way we roll.

Cut the salvage edge off your fleece.  Cut this strip in half.  Cut one half in half again, and set the other half aside.

Thread the two pieces of the first half through the holes in the cone-hat.  Knot them on the outside.  Use a piece of duct tape to secure the knots to the side of the hat, so they will be as flat as possible, but won’t slip through the holes.


Wrap the tip of the cone-hat in duct tape.  Extend the tape past the end of the cone and give it a bit of a curve.

Cut your fleece in half along the fold so that you have two relatively square pieces.  Mine were each a yard long.  Use one piece to wrap your cone-hat.  I let a bit hang over the edge in the back of the hat, so none of the poster board would show.  Use the hot glue gun to secure the fleece to the poster board, trimming off any excess fleece as needed, and making sure your curved duct tape tip pokes through the top.


Where the fleece overlaps the point on the front of the hat, fold it over and glue it to the underside of the poster board with the glue gun.

Your hat should now look like this:

Set your hat aside and have your kiddo lay down on the second piece of fleece. I took this picture and then decided to turn the fleece the other way, 90 degrees.  So the wings will be wider, rather than longer.  Make sure your kid is at the very top of the fleece, and then mark where his armpits are and cut two slits in the fleece, about two inches long.  Fleece is very stretchy, so don’t cut these too big, or too close to the edge.


About two inches in from the edges (where his hands would be) cut two more slits about an inch to an inch and a half apart for each hand.  Again, not too big, they will stretch.

Cut the bottom of the fleece into a wing shape.  Folding it in half makes it symmetrical.


Have him put his arms through the armpit holes like he was putting on a jacket, then his hands through the hand holes so that his wrists are through and he can grip the fleece in each hand.  Now, measure where his waist is and cut two small slits about two inches apart in the center of the wings.  Thread the second half of the salvaged edge strip through these holes so that the long ends can tie around your kid’s waist.

The wings should now look like this (H is holding them up – not wearing them yet):

Now, using the felt, make dinosaur-like designs to decorate your wings and hat.  This is easy, since no one knows what dinosaurs really looked like!  We did these oval, spot thingies for the back/outside of the wings.


And wavy, red and orange stripes for the front/inside of the wings and for the hat.  Attach all your felt decorations with hot glue.

Now, dress your kid in some dinosaur-hue clothing appropriate for the weather where you trick-or-treat.  We used brown pants that we already had, and a greenish shirt.  If I can track one down before the 31st, I might have him wear a yellow shirt instead, because every knows pterodactyls wear yellow shirts

Have your kiddo thread his arms through the wings, tie his belt (under his shirt), and tie on his hat.  Notice that I covered the back of the belt with a dino-spot.

Voilà – pterodactyl!

Ka-kaw, ka-kaw!

Happy Halloween!

Oh, and if you are like me, you should just buy double the fleece you need, because you are going to make the first wings too small.  But this is actually a good thing, since all pterodactyls live in family groups…

Categories: DIY, Thrift | Tags: , , , , , , | 9 Comments

Fall at the Homestead

The first day of fall was last week, and we are entering one of the busiest times of the year around here.  Of course it’s harvest time – which means much of our work moves from the garden to the kitchen.  You’ve seen all my posts on jam lately, but I’ve been canning too.  A little over ten quarts of tomatoes so far, and we’re going Sunday to our CSA farm to help pick more toms and to pick and roast green chiles as well.  The tomatoes will also be canned and the chiles peeled and frozen.

I’m glad we had the CSA to fall back on this year as my tomatoes were so sad.  I was actually a bit worried.  It sure is nice to see the pantry shaping up after all.

Lots of Christmas gifts here too.

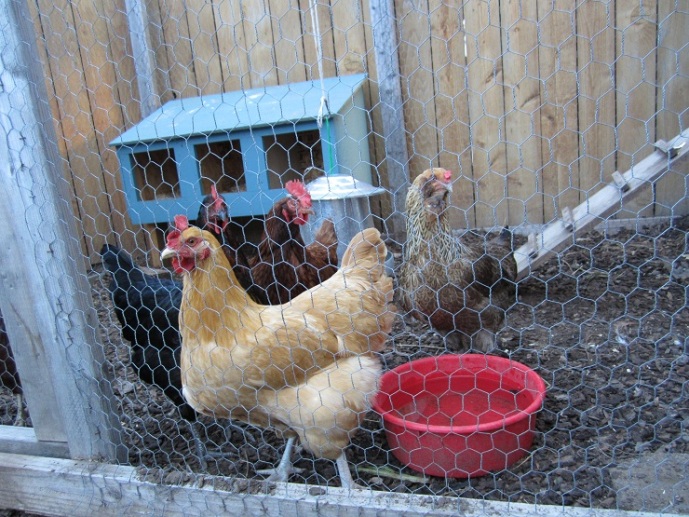
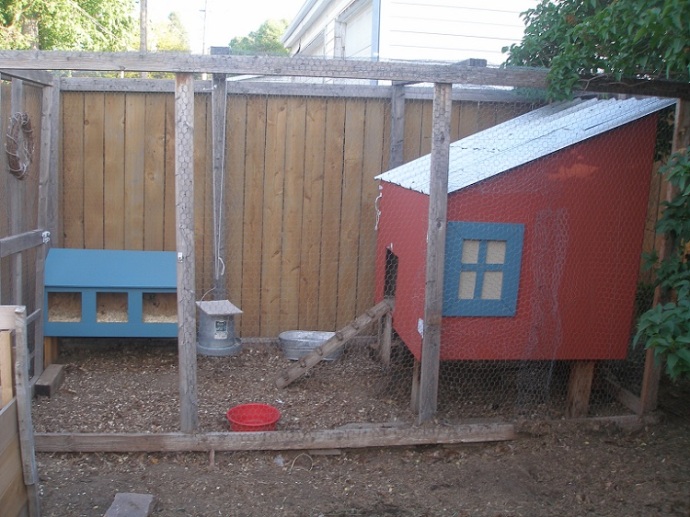
This coming weekend is the second annual chicken coop tour.  Locals can purchase tickets here or here.  We participated last year as well, and we are excited to show off again this year.  The coop had a couple of improvements this spring and summer and I really wanted everything in place for the tour. Rick bought me two galvanized garbage cans – one for the chicken food and one for finished compost, but when I started harvesting the compost, I had enough to fill both, plus half a wheel-barrow-full that I pawned off on the neighbor (it was a hard sell, trust me).  The chicken food is still in the garage for now, and there are almost two bales of straw under a tarp out there.

The hens seem excited to have straw in the coop for the first time.  We’ve always used dead leaves or pine shavings in their coop, but the “fall” part of the season has yet to happen here and we wanted to coop cleaned up for the tour.  We were hoping for some wood chips to spread over the ground before the tour too, but it looks like we’ll have to go with out.  Despite that, the chicken area looks nice.

The extra straw, not for the coop, will be used to mulch the garlic that we ordered and saved for seed.  I ordered two varieties this year and saved ten bulbs from a third.  We hope to plant around 125 cloves after the first frost hits.  That should yield us enough garlic for the year next year, including some to save for seed in 2012.

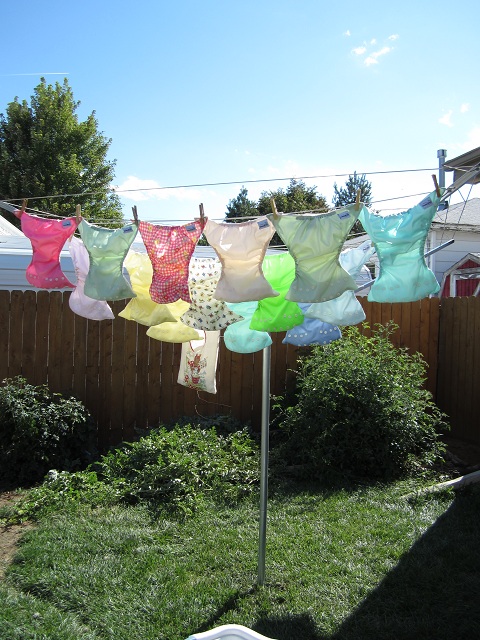
A couple of weekends ago, Rick and H put up my clothesline for me.  I was so excited to get the line that Rick’s mom had promised me.  But once we got it home, we actually couldn’t manage to get it into working order.  After fighting with it for a couple of weeks, we ended up buying a new one, and I love it!  I’ve used it everyday, but I’ve realized I need more clothes pins.  The line holds a lot, and C’s diapers (and inserts and wipes) take up all the pins I have.


We harvested our concord grapes – one whole bunch!  There would have been two bunches, but I accidentally knocked off the second bunch early on in the summer  when I was trying to get the vine on the trellis.  Not too bad for it being the vine’s first real season – we just planted the cutting last spring.  We hope to use this vine to make a few more cuttings when the pergola is done.

Speaking of the pergola, Rick’s uncle brought us down our first pieces from the mountains.  The posts are here!  We will be setting them on poured concrete footers this fall and we’ll begin laying the patio in the spring.  This was the goal of the tree removal project.  I had hoped to have it done all in one summer, but it really was a huge undertaking to manage on our own.  Not to mention having a baby this summer too.  (There’s that old excuse again!).  😉

There is a huge amount of beetle-kill pine in our forests here right now (a heart-breaking 4 million acres in Colorado and Wyoming), so we plan to build the whole pergola out of salvaged logs.  Once it’s constructed, we will plant and train grape vines over it.  I am very excited about it, but it’s been slow going.

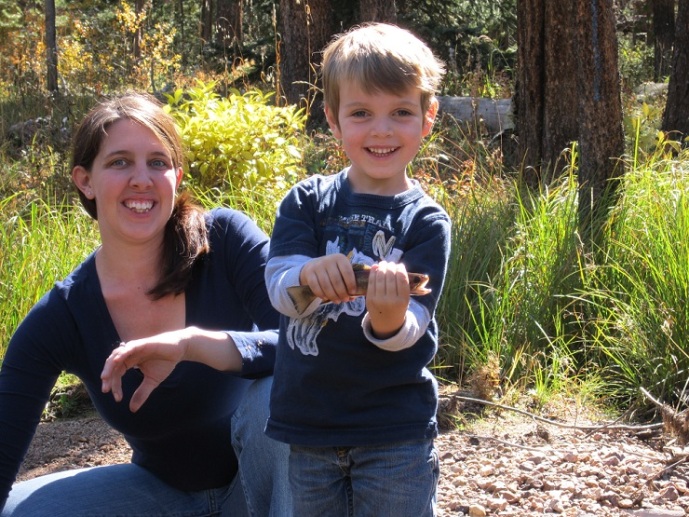
Fall is also the time when we start filling the freezer back up with meat.  We actually got a good look at the forests this year as we did some prep work for hunting season.  Rick sighted in his rifles at the range up on Highway 40, and we did a little grouse hunting and some fishing.  We were skunked on the grouse, but Henry did catch his first fish!  He let it go so it could grow up a bit.  Nothing was added to the freezer yet, but the trip was great fun anyway, and we’ve ready for big game in a couple of weeks.

So that’s what we’ve been up to lately – I’m hoping the tour participants will give us grace on the yard still being half done.  Oh well, they’re coming to see the coop, right?  😉

Categories: Canning and Food Preservation, Chickens, DIY, Garden | Tags: , , , , , , | 15 Comments

Jam Fever!

Last weekend, we went to Palisade for our annual trip to Bracken Orchard to pick peaches.  We drive 240 miles over the mountains, each way, so we want to make sure we make the trip worth it.  This year, we came home with 368 pounds of peaches (slightly less, since about half a box was Fuji apples).


We had 15 pounds for my sister and 40 pounds for some friends, but the rest we’ve been working on getting put up for the year.  Most of them are sliced and frozen in quart-size bags, and many get made into various jams for our use during the year and for gifts.  We canned some a few years ago, but we feel like the frozen ones are more versatile and last us longer.  Plus they are easier to put up and take up less space.

True to form, I decided to defrost 40 pounds of the plums that were given to us last year at peach time.  We didn’t have time then to process them properly, so of course I thought we’d have time this year!  What is wrong with me?!? I spent the whole week making plum jam while Rick sliced and froze the peaches.  I didn’t get all the plums done before some started to smell “off,” but I got most of them taken care of.  Smarter people would have just defrosted a little at a time.  Then I moved onto the peach jams.

This has been the most fun I’ve ever had jamming though.  My friend Kristen has been a godsend, coming over twice to make jams.  We got a little crazy the second time, trying new recipes.  I spent a good portion of my grocery budget last week on organic Madagascar vanilla beans, green cardamom pods and various liquors for our jam.  Some combos we tried:  Peach with Honey, Vanilla Bean and Brandy (wow – the smell!), Plum Lavender (AMAZING!!), Peach-Plum Ginger, Plum Noir (ooh lala!), and a couple of original creations, Kristen’s Honey Peach Cobbler jam, and my Jalapeno-Honey Plum.  We’ve had a ball.

I’ve even ordered special jars.  I hope they arrive by this weekend (I plan to make Peach, Blueberry and Grand Marnier jam and my favorite traditional peach preserves), but if they don’t make it, I’ll use them next year. I found most of these recipes on the Punk Domestics site, by the way.  If you put up – you should definitely check it out!

So what are your favorite ways to use peaches?  Plums?  Any awesome jam recipes?

Categories: Canning and Food Preservation, Community, Recipes, Recommended Reading | Tags: , , , | 11 Comments

Late Summer Snapshot

It’s been almost three weeks since I’ve made it onto the computer.  I’m sure you were wondering if I had some sort of mysterious injury related to a grub hoe and a compost bin.  But I assure you, everything is fine.  The sun has been out, and things have been growing like mad, including both boys and C.  So the blog has been collecting dust!  In the mean time, I’ve been able to get a few things done around here.

We picked cucumbers up at our CSA and put up 48 quarts of pickles.

We got the tree trunk and stump hauled away to a mill.

And we put some 7 pounds of elk meat into the dehydrator to become jerky.

We harvested corn and our first potatoes with the neighbor.

I have to say that harvesting potatoes is one of the funnest things ever – it’s like a treasure hunt!

We ended up with 40 pounds of fingerlings and 50 pounds of Desirre red potatoes!  We will have plenty for seed next year and hopefully enough to store through the winter.

We also have a neighborhood BBQ in the works and have been spreading the hens’ good will via eggs and some extra garden onions.

We are getting ready for some berry picking and peach picking in the next week or two.  I am excited to get some preserves into the pantry as well.  We are going to take a walk tomorrow to the house with the concord grape vine and see if the new family there will share some grapes with us this year like the last tenants there did.  We are bringing some 2010 jam with us to give them as an incentive!

The late summer/early fall is one of the busiest times around our homestead.  Harvests are coming in, the dehydrator is running, and we are trying to see if we can manage to get the yard back in shape in time to participate in the second annual Denver Botanic Gardens chicken coop tour.  If you remember, I made some improvements on the coop this spring with the tour in mind, and last year was a lot of fun, so it’d be really great if we can pull it together in time.   More updated posts in the coming days – I am finally getting back on the ball around here, I think.  😉

Categories: Canning and Food Preservation, Chickens, Community, DIY, Garden, Independence Days, Urban Homesteading | Tags: , , , , | 1 Comment

Create a free website or blog at WordPress.com.