Posts Tagged With: Chickens

2012 DBG Urban Homestead Tour – Part III

I’m excited to show off the last three stops we were able to get on during last month’s Denver Botanic Garden’s Urban Homestead Tour.  These three homesteads were in the heart of the city.

Toni and Dennis Kuper shared their wonderful coop with visitors.  Two years ago, Toni asked for chickens for Mother’s Day, and Dennis built the coop for her.   It is adorable and efficient.

I love how they designed it to store their chicken care supplies right inside.  It is adjacent to their dog run under a stand of shady trees in their beautiful back yard.  They have an annual chicken party for friends and coworkers in their yard.

The Kuper’s yard is mostly shaded, but they have a lovely garden carved out in the only sunshine near the garage.  I especially love the four-bin compost operation.

Our next stop took us into the Park Hill area, where we got to check out Michael Murphy’s coop and gardens.  The first thing we saw was squash and cukes inter-planted with flowers in his front yard.

The side and back yard held lovely raised beds with some great whimsy.  I love the brightly painted stakes and bird houses.

Murph made his coop primarily of recycled/re-purposed materials, and I’ve never seen anything like it.

There are two dogloos inside the chicken run.  But I just can’t describe what I thought when Murph showed us how he set them up for the neighbor kids to gather eggs.  See for yourself…

The igloos are on giant lazy-susans, and inside each dogloo is two coolers/nest boxes.

The hens both lay and roost in the coolers.  The system is warm in the winter and easy to keep clean.

The coolers just slide out for egg collection or cleaning.

I love the engineering behind this coop and how much fun it is.

The last stop I wanted to share was literally packed full of growing things.  The Blackett’s were the only homesteaders on the tour with a yard smaller than ours.

Driving up, you can see they had food growing in the hell strip between the sidewalk and the street.  A lot of people refuse to plant here, but I love that they have turned it into a garden.

We walked down the side yard where the Blackett’s keep their chickens and compost bin.

The little red coop is built from scrap wood, left over from a previous project.

The side yard gives way to an entire back yard garden.  I mean, the entire yard.  There was no grass anywhere – just a path between all the food growing.

Diane was on the back porch, generously giving out samples of honey from her top bar beehive.  The hive was at the very back of their lot, next to the garage, under the grape-vine.

I was very inspired by Diane’s garden.  Rick and I had been feeling a little jealous about all the space that many of the homesteaders had.  But Diane was growing more food than we were, in less space.  It was very encouraging.

Diane blogs about her garden, bees, chickens and homesteading at City Garden Bliss.  She has many more beautiful photos of her garden and covers topics like spinning, knitting, gleaning, and sewing as well as gardening, bee, and chicken keeping.

Thank you for letting me share the stops we went to at this year’s urban homestead tour.  I hope you enjoyed it.  I can’t wait until next year!  This was so fun for our whole family.

Make sure to check out the photos of the other stops in Part I and Part II.

Categories: Beekeeping, Chickens, Community, Garden, Urban Homesteading | Tags: , , , , , , | 5 Comments

2012 DBG Urban Homestead Tour – Part II

The next two stops on the Denver Botanic Gardens Urban Homestead Tour that I want to share were two of my favorites.

Lori in Aurora was growing a great variety of vegetables.  In the circle in her front drive way she had many varieties of winter squash, summer squash, cucumbers and melons.   She was very generous and gave us two good sized spaghetti squash to take home.

In her back yard, she was growing in raised beds.

Her kale and tomatoes were fantastic, and we exchanged tips on season extension and overwintering greens.

But Lori had something completely different up her sleeves.  Aeroponic gardening.  Her website explains this a lot better than I can, but basically you can grow a large amount a vegetables in a very small space in about half the time as traditional in-ground gardening.

Above is a newly planted tower garden.  It holds water in the reservoir at the bottom.  The water is pumped through the tower which both waters and oxygenates the plants.  It can be plugged in to a regular outlet or converted to solar.

Below you can see water pumping through the tower.  We lifted the lid at the very top of a full-grown tower to see.

This tower was planted July 27th.  The photo was taken September 22nd.  Look at the size of that melon in only 8 weeks!

This would be an incredible option for those wanting to grow a sizable garden in a very small space (apartment dwellers, perhaps).  Also great for those who can’t do a lot of bending.  It is all grown vertically – the tower stands about five feet tall and is on rollers.

This tower is growing greens in the heat of the summer, a tomato plant, cucumbers and heirloom watermelon all in an area of 2.5 x 2.5 feet.  The towers are a bit spendy, but they do use water and space very efficiently, and the company offers payment plans.  This was the second planting of the summer for Lori and her family in this tower.

Check out Lori’s website for more info on aeroponic growing:  DenverTowerGarden.com

Where Lori’s gardens are so compact, Brenda and David Zserdin’s garden is completely opposite.

Up in old Lakewood, the Zserdin’s are growing on a half-acre, a very eclectic and sprawling mini-Eden.   Their little white coop houses 24 chickens, a mix of Bantams and full-size hens and roosters.

Inside the coop is a tree-branch roost that runs the length of the whole left-hand wall.  On the right are nest boxes, feed and water and space to store supplies.  The Zserdin’s had to give this coop a little TLC to make it warm enough for the winter by adding insulation and heat lamps.

It’s easy to see that Brenda and David’s birds are spoiled and happy.

H and E quickly found a friend in the Zserdin’s son, who also happened to be wearing a cape that day.  They ran off to play while we toured the homestead.

Their garden is just amazing.  Lots of re-purposed materials for garden structures as well as fun decorative elements make it a joy to walk through.

I loved the pole beans growing on actual poles and walking over wooden planks, past the cukes and melons trellised on old pallet wood.

Vegetables were planted in a tractor tire, old tubs and in the ground.  We wound our way through the tomatoes to the grape vines at the back of the garden.

Rick was quick to spot the Three Sisters planting among the extensive culinary and medicinal herbs that Brenda has growing.

I was in love with the compost bin set-up they had.

Brenda and I found a lot of common ground talking about chickens, homeschooling and preserving the harvest by canning and freezing.  David and Rick hit it off too, talking wood cutting, home brewing and whatever else men talk about while their women are off discussing the merits of sand for litter in the chicken area.

David and Brenda work from home doing an embroidery and screen printing business, Flutterby Designs, as well as homeschool their children.  The Zserdin’s were very gracious hosts.  They chatted and offered snacks and drinks and made us feel completely at home, like old friends.  We exchanged phone numbers and email and are excited to count them as new ones.

Later this week, I’ll show you the last three stops that we were able to get to on the tour.  In the mean time, make sure to explore the photos I posted in Part I.

Categories: Chickens, Community, Garden, Urban Homesteading | Tags: , , , , | 3 Comments

2012 DBG Urban Homestead Tour – Part I

Two weekends ago was the first annual Denver Botanic Gardens’ Urban Homestead Tour.  I was able to go on the tour and be a community sponsor.  It was so much fun to see what others around Denver were doing at their homes.  Each home that we visited was doing something different, and I thought everyone else might be as interested as I was to see our movement moving in the Mile High City.

The first homestead that we visited were neighbors of ours… we could have walked there, but I had no idea this place existed.  We live in an urban area.  Our lot is pretty small (in fact only two of the places we visited had lots as small or smaller than ours).  So I was surprised to come upon the gem that Leigh and Diana have created in my ‘hood.

Leigh is quite the craftsman.  He built the house on the acreage (!) himself, including the above green house.  The big trees were all on the property already, but the cherry, peach, plum and apple trees were all planted by the Bray’s.

Inside the green house they are growing bananas, among many other beautiful plants that we’d never get to survive otherwise in Colorado.

The Bray’s purchased the property from an elderly neighbor (Leigh said she told him she’d never sell), they worked with the city to narrow a portion of the ditch from 20 feet wide to 8 feet wide and at the same time got a the lane behind their property turned from a road into a walking path.

The Bray’s have a large garden area.  The older garden is in the background, and a newly dug garden, for 2013 is in the foreground.

Beyond the trees is where the ditch flows.  Calling it a ditch seems silly – it’s a beautiful, clean creek banked by green grass.  They even have two bridges over it and a little row-boat.  The bee hives are on the other side.  I wish I had taken a picture of it.

The Bray’s invited my boys to use the rope swing over it; I didn’t let them, it was our first stop.  But they did take them up on the offer to play in their tree house and zip-line in the yard.

The Bray’s daughter (pictured with my little super hero-cowboys) convinced her parents to get chickens.

Leigh naturally built the coop himself.  It’s a great design; wired for brooding chicks and a heat lamp for the winter.  Egg boxes that are easily accessible and a fully enclosed run.

See that second coop in the far background?  (click on the picture for a better view).  Leigh and Diana sell the coops that Leigh makes.  They offer three fully assembled sizes to house from 2 to 12 hens, AND free delivery up to 50 miles from Denver.  They can even be rigged with solar panels to power the lights.  Check out their website: chickencoopsofcolorado.com

The next stop took us into the heart of downtown Denver.  Matt McClusky of Foodie Call Catering opened his 2500 square foot garden to visitors.

Matt is using his lot to its fullest.  I loved the hanging tomato plants all along his porch at the front of his house.

Just beyond the fence, all along the front of the house Matt has veggies growing:

If you walk around the side of the house, you’ll see how he keeps pest out of the garden and nutrients in.  My boys were totally scared of the scarecrow, and this is just one of the many compost bins I photographed on the tour.

All along the North side of Matt’s property, he was growing a lush vegetable garden.  I lost track of how many varieties, which included beautiful eggplant and broccoli plants taller than Henry.

Here you can see how he uses trellises along the fence line.

And here are more beds running the full length of his lot.

Finally, here are the super tall pole beans with a beautiful herb garden growing at the base.

The gardens and homesteads we saw on the tour were just amazing.  This is the first of three posts that I plan to share about the tour.  I’m so grateful that all the participants agreed to let me photograph and share their homesteads here, as well as opening their yards to the public.

Edit:  I mistakenly stated in my original post that the Bray family had the city ditch moved, however, the ditch was hand dug in 1863 and it has been in the same place since that time.  Instead, the Bray’s worked with the city to narrow the ditch at the corner of their property back to its original size (8 feet wide) as stated above.  I apologize for my mistake. 

Categories: Beekeeping, Chickens, Community, Garden, Urban Homesteading | Tags: , , , , | 6 Comments

Homestead Garden Tour – May 1, 2012

I wanted to post an update of how things are growing here at the homestead this spring.  I’m excited about our gardens this year, and we’ve worked pretty hard at getting the yard in shape after last year’s tree removal.  Last weekend, we finished the privacy fence along the driveway.  We are really excited about this, since now we’ll be able to explore planting some fruit trees or berry bushes or something permanent along the fence line (we’re not sure what yet). Now we just have a flagstone patio to install (and a pergola)!

We’ve had a lot of spinach so far this spring from plants that self-seeded last year.  And we’ve enjoyed bits of Swiss chard here and there from plants that we planted last year, overwintered and have just kept right on going.  Perpetual chard!

This slideshow requires JavaScript.

I’m very excited that our garlic is growing so well.  I think we planted enough for the coming year, plus enough for seed (I’m hoping anyway).  And our potatoes that we planted have grown so much that we’ve hilled up three times so far.  I’m hoping for a big harvest there as well.

The neighbor has already planted a row of corn, and we put the giant pumpkin seeds in the ground last week (along with a few sunflowers).  This week will be our main summer planting.  We are excited to get all those seedlings in – tomatoes, basil, peppers, chives, rhubarb, strawberries…

How is your garden shaping up so far?

Categories: Beekeeping, Chickens, Garden, Urban Homesteading | Tags: , , , , | 10 Comments

Five Things No One Tells You About Chickens

Over the last five years I’ve learned a few things about keeping chickens in the back yard.  And while, for the most part, chickens are really fun and the positives far outweigh the negatives, it’s not all roses.  No, they are not noisy.  No they don’t stink.  But there are a few lessons we have learned about the urban homestead’s favorite creature feature:

  1. cactus poppyDon’t name them.  Chickens are so far down on the food-chain that they are pretty much dinner for everything except insects.  Naming them is just setting yourself up for heart-break.  We named our first five chicks.  But the tears when Daisy was killed by a fox were enough to cure us of this.  The next two rounds of chicks were nameless.  While we still knew them as “the red one” or “the big one,” it kinda kept our feelings a bit more protected.  And we were able to eat the ones without names when the time came.
  2. Every one will ask if you need a rooster to get eggs.  I’m not really sure why this is a question?  If there is no rooster, the eggs will never become chicks.  Eggs are not baby chickens.  Eggs are just eggs.  At some point you will find yourself, once again, explaining that eggs are basically like a tasty chicken period that happens daily.  Yum, right?
  3. Baby chicks are messy.  Very, very messy.  Our first chicks were raised in a box in our office.  They were so cute.  When they finally moved outside, the office was completely covered in a very thick layer of dust.  It was awful.  The next chicks got the luxury of a heat lamp in the garage instead.
  4. Chickens dig deep holes.  Like, to China.  We used to let them free-range through the whole back yard.  Our yard is small, but they never ate all the grass.  They pooped everywhere, but we could hose off the patio.  The real bummer were these gigantic, deep holes.  They use them for dust baths.  Later, we moved the coop to one area of the yard.  The hens still free-range, within their area, and they’ve eaten all the grass back there and dig to their hearts’ content.  And we are no longer breaking ankles in the giant holes.  Bonus: the kids can now roll a ball in the remaining grass, poo-free.
  5. You will be spoiled by the eggs.  If, for some reason you need to buy eggs from the store, you will scowl at their sickly, yellow insides and scoff at their bland taste.  They literally pale in comparison to your awesome, dark-yolked, delicious, home-grown eggs.

So while others continue to extol the merits of the back yard flock, don’t come to me saying you weren’t warned.  😉

Categories: Chickens, Top 5, Urban Homesteading | Tags: , , , | 47 Comments

Deep Litter Method for the Lazy Chicken Keeper

When we first researched keeping chickens, my only hesitation was the idea of having to clean a coop weekly.  I used to have a parakeet, and I hated changing his newspaper tray, and I hated cleaning my hamster’s cage too.  I was dreading having to clean a coop.  I envisioned this, happening weekly (by the way, she was cleaning a coop inherited when she moved to the property for the first time).  Then, I ran across something describing the deep litter method, and I knew I had found the solution.

We clean our chicken coop (specifically the hen-house) twice a year.  And no more.

And the coop does not smell.  In fact, when we participated in the Denver Botanic Gardens/Denver Urban Homesteading Chicken Coop tour, everyone remarked on how our coop did not smell.  I didn’t clean it before the tour, because I wanted to show what the method off and let people see what it looked like to have chickens in real life.

What we learned was that we were, at that time, the only chicken keepers on the tour using this method.  Every other owner had told the tourists that they cleaned their coops weekly.  We were surprised by this and actually started making a joke of it, calling ourselves the lazy chicken owners on the tour.  People laughed and that’s how I actually came to the name, the Lazy Homesteader.  😉

Here is how the method works in case you are like me; allergic to hard work involving poop.

Clean your coop one fall day and then put down a layer of dried leaves or pine shavings or some other kind of litter (not straw – it’ll stink to high heaven).  Then you let the chickens poop on it.  Then when it’s thoroughly covered over in poop…

Put down more shavings or leaves. I just throw it in – I don’t spread it nicely or anything.  I’m not touching that crap.  😉  The chickens will dig through it and spread it around anyway.

Repeat until spring comes.  Note that I mainly just put litter down right under the roosts.  If it’s very rainy or snowy, we put their food and water inside the house (usually we keep them in the run) and we don’t want them to throw litter in the food and water.

Finally, on a nice day, when you feel like doing it, bring the wheel barrow over to the coop, scrape it all out, and dump the decomposed poop/leaves/shavings mixture into your compost bin.  It’ll be mostly all composted anyway.  Then clean out the coop and put down a fresh layer of shavings or leaves (if you have any more).

You are basically composting in the bottom of the hen-house.  And as you learned a couple weeks ago, compost generates heat, perfect for helping your flock stay warm during the winter.

And I can totally handle cleaning only twice a year.

Categories: Chickens, Compost, Urban Homesteading | Tags: , , , | 57 Comments

UH Basic Training: Chicken Keeping 101

Everyone in the household is seemingly well again, so urban homestead boot camp is back in session!

After a garden, when someone mentions “urban homestead” many people think of chickens.  To me, chickens are a bit of the country right here in the city.  They aren’t particularly noisy, they don’t take up much space, and it doesn’t cost much to feed them (ever heard the expression “chicken feed?”).

I have an awful lot to say about backyard chicken keeping.  Enough probably to fill a book.  It’s fun and the eggs are well worth the effort you put in.  In order to keep this post from becoming a novel, here are the down and dirty basics of urban chickens.  I am, of course, not an expert.  We’ve had chickens for five years now.  We’ve encountered a few problems and we’re continually learning as we go.  But if you’re looking at getting birds for the first time, here are some basic guidelines.

The Rules

First off, are chickens allowed where you live?  Check your city ordinances.  There are usually stipulations on the number of birds, the size of area required for them and in some municipalities, there may be a permitting process.  You can sometime skirt your HOA if they only stipulate the number of “pets” allowed and not what kinds.

Last month, The Crunchy Chicken had a guest post about what to do if your neighbors or HOA is not on board with your backyard flock.

Getting your neighbors on board is pretty important.  Luckily, it’s a pretty easy thing to do as well.  All of our neighbors love our hens.  The kids especially.  And the promise of fresh eggs are a great way to build some good will between neighbors.

You might be surprised where chickens actually are allowed.  Highlands Ranch, here in Colorado, for example is chock-full of HOAs, and they totally allow chickens.  So check it out.

This link has lots of city codes listed, but not every city.  A Google search will help if it doesn’t have your city.

The Birds

For most backyard flocks, you’ll want only female chickens.  Roosters are loud and crow all day, making it tough to stay on your neighbors’ good sides.  Plus they’re generally not very friendly.  Despite the fact that everyone wants to ask you how you plan to get eggs without a rooster, you don’t need one.  Without a rooster, all your eggs will be unfertilized and you’ll get to skip the 4:00 AM wake up calls (and at 11:33, and at 3:28, and at 6PM).

You can start your flock by getting chicks, started pullets, or hens.  Chicks are the least expensive, but you will need to raise them indoors under a heat lamp until they have grown all their feathers and can move outside, which will take a few months.  Pullets are female chickens that are less than a year old.  They will cost you more than chicks but you’ll get eggs sooner, since most chickens begin laying around six months old.  Or you can buy grown hens that are already laying.  They will be the most expensive since someone else has fed and housed them for a year with little benefit of getting eggs.  You probably don’t want to buy hens that over two years old if you want many eggs though.  Their peak laying years are the first two (from age 1-3 years).

You can order chicks in the mail or buy individuals at a feed store or from a local farmer.  There is only one site that I know of that will ship chicks in quantities less than 28.  We bought our chicks locally, so I can’t say how they do this.

Pullets and hens can also be bought from local farms, sometimes on craigslist, or at markets or poultry swaps.  Chickens are social, so you’ll probably want at least three or four.

There are lots of breeds of chickens.  If your climate is cold in the winter, you will want a heavy breed that can keep its self warm.  Bantams are miniature chickens and their eggs are about half the size of regular chicken eggs.

The Coop

Your birds need about two square feet apiece inside their hen-house.  It needs to have a roost and they’ll want a place to lay their eggs. The size, shape and style of your house and coop are limitless.  Check out some of these ideas for small backyard coops.

Coops are easy to build yourself if you are the handy type, or small ones can be bought locally or online for a few hundred dollars.  We built our coop ourselves and over the last five years have made only some minor modifications.  (Though I admit I have a few more in mind for this coming year).  I’ve seen people convert dog houses, old sheds and abandoned campers into chicken coops.

The original construction of our coop looked like this:  Coop Construction!

The main things to keep in mind are a place to rest, a place to nest, a place to get shelter and a way to keep predators out.  Many people advise using hardware cloth to keep raccoons out.  We have been successful with simply using chicken wire, which is much less expensive.  Although we’ve had chickens killed by foxes and raccoons, it was never due to a breach in the security of the coop, only due to the negligence of the chicken owners (we forgot to close the coop at night).

A chicken tractor is like a mini coop on wheels with a run attached that can be used to let your hens graze or catch bugs and then moved to a new spot so that they don’t eat the grass down to the dirt.  A great idea if you have the room for it.  Check out some neat ones here.

The Food

Chicken are omnivores.  I always sort of chuckle when I read “vegetarian fed hens” on a carton of eggs.  Now that’s good in commercial eggs, so that you know those poor birds weren’t fed other chickens.  But your chickens will certainly not be vegetarians.  They will eat bugs and worms, and I’ve heard they can catch and kill a mouse.

For the bulk of their diet, however, you’ll want to feed them something.  You can make your own food for them using a mix of grains and seeds.  A quick Google search will lend you many guides and recipes.  Depending on your resources this might be less expensive than buying pre-made food.  For some it is expensive if you’re in a big city far from where the grains are grown, and so it is easier to buy the bagged stuff.

Pre-made choices include conventional, organic, medicated, pellets, crumbles, mash and if you’re lucky, whole grain.  Most backyard flocks don’t need medicated feed, even for chicks.  These feeds are made for large, commercial flocks, where chickens are kept in too-close quarters and make each other sick.  There is no need to dose your flock with antibiotics out of the gate with only three or four or twelve birds.

Pellets, crumbles and mash are different forms of the same feed.  The ingredients in the feed are ground up and then pressed into shape before being packaged.  The shapes are self descriptive.  These are a matter of personal preference since chickens will eat all three.  It comes down to what you prefer and how much the birds waste.  My birds have always flung feed out of the feeder, but if the feed is pellets, they still get eaten off of the ground.  All of these feeds are susceptible to moisture.  If they get wet, they will pretty much disintegrate.  So store it where it will stay dry, and keep a cover on your feeder if it is outdoors.

Conventional chicken feed is the least expensive but carries the risk of chemical pesticides, fertilizers and GMO ingredients.  Since here in the US, they don’t label those things on human food, they certainly won’t on chicken food.  If you want to avoid these (remember, your chicken is making eggs with that food, and you will eat the eggs), you should buy organic.  It can be more expensive than conventional feed, unless you can find a local source.  We have found a local farm co-op that offers us organic, whole grain layer feed for 43 cents/pound.

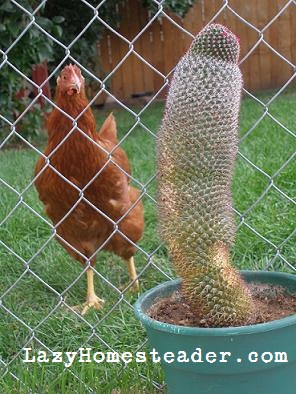
Your chickens are great garden disposals as well.  They love to eat greens, weeds, kitchen scraps.  I’ve often joked that they are like miniature pigs.  The only things I have not seen our hens devour are potato peels and mushrooms.  Otherwise, they will pick clean a ham bone as quickly as they will hork down mushy strawberries.  They stick their skinny necks through the fence to attack our Swiss chard on a regular basis, and they practically live in the compost pile during the winter.

They will eat eggs.  And if you cook them scrambled eggs, that’s fine.  They don’t identify an egg smashed flat on the ground as the same as an egg they just laid (they are not the brightest creatures).  But be cautious.  If they get a taste for raw eggs, soon they will be plundering their nests and eating more eggs than you.

Crushed eggshells are a good supplement for them to get calcium in their diet (to make strong shells).  You can also offer crushed oyster shell, whey, other dairy products and leafy greens.  They’ll chow down and thank you.

The Work

You know how my site is called The Lazy Homesteader?  Well, it’s because I really don’t like anything that is complicated, hard work, or lots of maintenance.  The main work in caring for chickens, I’ve found, is making sure they have fresh water everyday.  They need it replenished often in hot weather and they need the ice chipped off in the cold.  So every day, they need water.  That I can do, if Rick is helping me.  😉

Their feeder holds enough food for a few days, so I just check it when I’m giving them water to make sure it’s not empty yet.  And I collect eggs.

Your hens will eventually molt.  This is when  they lose and regrow feathers and take a break from laying, and typically happens in the winter.  The molt is dependent upon hours of daylight,  so if you want eggs year round, they need a light in their house to trick their bodies during the winter.  We’ve found that they don’t need it to keep warm (admittedly we don’t have ice storms here, so I can’t speak to that), but their feathers and group body heat seems to do the job.  We let them take a natural break from laying and don’t provide a light in the winter.

Cleaning the coop is the other main work of keeping chickens.  We use a deep litter method and only clean a couple of times a year.  We’ve found this doesn’t work that well with straw as the coop bedding.  It is great however with leaves or pine shavings.  During the first chicken coop tour, everyone remarked on how nice our coop was – that it didn’t smell at all.  But then one time we decided to try straw.  The coop stunk within the week.  It was a horrible stinky ammonia smell.  And messy.  They straw went everywhere.  A breeze blew it all over the yard.  It was slippery to walk on.  We switched back to dried leaves and pine shavings.  Later this week, I’ll explain the deep littler method in detail.    Others do use straw and change their hens bedding daily.  Still others use sand.  Find what works for you.

That is basically it.  This week, I’ll cover more chicken keeping things in detail.  This is a big topic, and I know this post is pretty general.  It may be elementary for old hands, but hopefully it answers some of the questions first timers might have.

Categories: Chickens, Urban Homesteading | Tags: , , | 13 Comments

Fall at the Homestead

The first day of fall was last week, and we are entering one of the busiest times of the year around here.  Of course it’s harvest time – which means much of our work moves from the garden to the kitchen.  You’ve seen all my posts on jam lately, but I’ve been canning too.  A little over ten quarts of tomatoes so far, and we’re going Sunday to our CSA farm to help pick more toms and to pick and roast green chiles as well.  The tomatoes will also be canned and the chiles peeled and frozen.

I’m glad we had the CSA to fall back on this year as my tomatoes were so sad.  I was actually a bit worried.  It sure is nice to see the pantry shaping up after all.

Lots of Christmas gifts here too.

This coming weekend is the second annual chicken coop tour.  Locals can purchase tickets here or here.  We participated last year as well, and we are excited to show off again this year.  The coop had a couple of improvements this spring and summer and I really wanted everything in place for the tour. Rick bought me two galvanized garbage cans – one for the chicken food and one for finished compost, but when I started harvesting the compost, I had enough to fill both, plus half a wheel-barrow-full that I pawned off on the neighbor (it was a hard sell, trust me).  The chicken food is still in the garage for now, and there are almost two bales of straw under a tarp out there.

The hens seem excited to have straw in the coop for the first time.  We’ve always used dead leaves or pine shavings in their coop, but the “fall” part of the season has yet to happen here and we wanted to coop cleaned up for the tour.  We were hoping for some wood chips to spread over the ground before the tour too, but it looks like we’ll have to go with out.  Despite that, the chicken area looks nice.

The extra straw, not for the coop, will be used to mulch the garlic that we ordered and saved for seed.  I ordered two varieties this year and saved ten bulbs from a third.  We hope to plant around 125 cloves after the first frost hits.  That should yield us enough garlic for the year next year, including some to save for seed in 2012.

A couple of weekends ago, Rick and H put up my clothesline for me.  I was so excited to get the line that Rick’s mom had promised me.  But once we got it home, we actually couldn’t manage to get it into working order.  After fighting with it for a couple of weeks, we ended up buying a new one, and I love it!  I’ve used it everyday, but I’ve realized I need more clothes pins.  The line holds a lot, and C’s diapers (and inserts and wipes) take up all the pins I have.


We harvested our concord grapes – one whole bunch!  There would have been two bunches, but I accidentally knocked off the second bunch early on in the summer  when I was trying to get the vine on the trellis.  Not too bad for it being the vine’s first real season – we just planted the cutting last spring.  We hope to use this vine to make a few more cuttings when the pergola is done.

Speaking of the pergola, Rick’s uncle brought us down our first pieces from the mountains.  The posts are here!  We will be setting them on poured concrete footers this fall and we’ll begin laying the patio in the spring.  This was the goal of the tree removal project.  I had hoped to have it done all in one summer, but it really was a huge undertaking to manage on our own.  Not to mention having a baby this summer too.  (There’s that old excuse again!).  😉

There is a huge amount of beetle-kill pine in our forests here right now (a heart-breaking 4 million acres in Colorado and Wyoming), so we plan to build the whole pergola out of salvaged logs.  Once it’s constructed, we will plant and train grape vines over it.  I am very excited about it, but it’s been slow going.

Fall is also the time when we start filling the freezer back up with meat.  We actually got a good look at the forests this year as we did some prep work for hunting season.  Rick sighted in his rifles at the range up on Highway 40, and we did a little grouse hunting and some fishing.  We were skunked on the grouse, but Henry did catch his first fish!  He let it go so it could grow up a bit.  Nothing was added to the freezer yet, but the trip was great fun anyway, and we’ve ready for big game in a couple of weeks.

So that’s what we’ve been up to lately – I’m hoping the tour participants will give us grace on the yard still being half done.  Oh well, they’re coming to see the coop, right?  😉

Categories: Canning and Food Preservation, Chickens, DIY, Garden | Tags: , , , , , , | 15 Comments

Blog at WordPress.com.