Posts Tagged With: Urban Gardening

2012 Resolutions Revisited

It’s the winter solstice.  The days are going to get longer and spring is on the way.  2012, you have gone by so quickly.

Around this time last year I set out a few resolutions for 2012.  Here’s a recap of what those were:

  1. Grow a giant pumpkin. 
  2. Grow enough in our own neighborhood gardens to feed ourselves for the summer.
  3. Process chickens.  
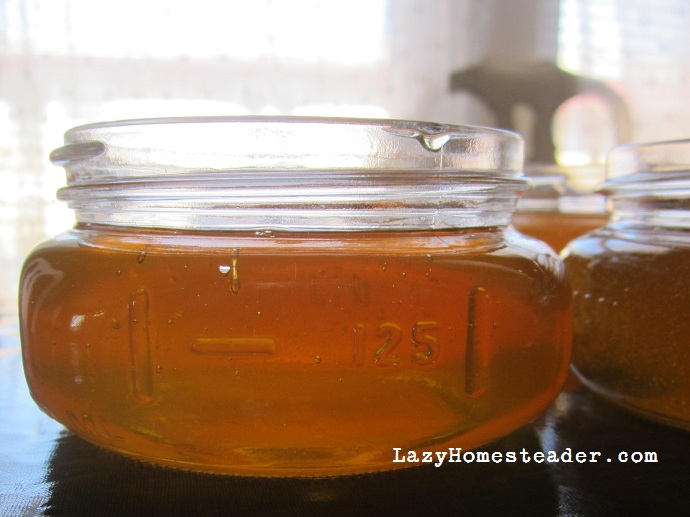
  4. Harvest Honey. 
  5. Start a monthly potluck circle.

So how did we do with those?  Well, we tried to grow the pumpkin.  We planted it, we watered it, we fed it compost tea.  But it only got to about the size of a volley ball.  So next year, we will have to try again.

Number two, well… not quite yet.  We’ll keep on that road.  We did process chickens this year, as well as harvest our own honey, though.

HHarvest10

The potluck.  We started the monthly potluck in February.  We have hosted one every month since then except in June (kids were all sick) and November (we were out of town, hunting).  And this is one resolution we are definitely keeping up with.

I’m still thinking over what my resolutions for the new year will be.  Do you have any resolutions for yourself yet?  How about ideas for me?  Something you want to see me try?

Categories: Community, Garden, Sustainability, Top 5, Urban Homesteading | Tags: , , , , , , | 6 Comments

2012 DBG Urban Homestead Tour – Part III

I’m excited to show off the last three stops we were able to get on during last month’s Denver Botanic Garden’s Urban Homestead Tour.  These three homesteads were in the heart of the city.

Toni and Dennis Kuper shared their wonderful coop with visitors.  Two years ago, Toni asked for chickens for Mother’s Day, and Dennis built the coop for her.   It is adorable and efficient.

I love how they designed it to store their chicken care supplies right inside.  It is adjacent to their dog run under a stand of shady trees in their beautiful back yard.  They have an annual chicken party for friends and coworkers in their yard.

The Kuper’s yard is mostly shaded, but they have a lovely garden carved out in the only sunshine near the garage.  I especially love the four-bin compost operation.

Our next stop took us into the Park Hill area, where we got to check out Michael Murphy’s coop and gardens.  The first thing we saw was squash and cukes inter-planted with flowers in his front yard.

The side and back yard held lovely raised beds with some great whimsy.  I love the brightly painted stakes and bird houses.

Murph made his coop primarily of recycled/re-purposed materials, and I’ve never seen anything like it.

There are two dogloos inside the chicken run.  But I just can’t describe what I thought when Murph showed us how he set them up for the neighbor kids to gather eggs.  See for yourself…

The igloos are on giant lazy-susans, and inside each dogloo is two coolers/nest boxes.

The hens both lay and roost in the coolers.  The system is warm in the winter and easy to keep clean.

The coolers just slide out for egg collection or cleaning.

I love the engineering behind this coop and how much fun it is.

The last stop I wanted to share was literally packed full of growing things.  The Blackett’s were the only homesteaders on the tour with a yard smaller than ours.

Driving up, you can see they had food growing in the hell strip between the sidewalk and the street.  A lot of people refuse to plant here, but I love that they have turned it into a garden.

We walked down the side yard where the Blackett’s keep their chickens and compost bin.

The little red coop is built from scrap wood, left over from a previous project.

The side yard gives way to an entire back yard garden.  I mean, the entire yard.  There was no grass anywhere – just a path between all the food growing.

Diane was on the back porch, generously giving out samples of honey from her top bar beehive.  The hive was at the very back of their lot, next to the garage, under the grape-vine.

I was very inspired by Diane’s garden.  Rick and I had been feeling a little jealous about all the space that many of the homesteaders had.  But Diane was growing more food than we were, in less space.  It was very encouraging.

Diane blogs about her garden, bees, chickens and homesteading at City Garden Bliss.  She has many more beautiful photos of her garden and covers topics like spinning, knitting, gleaning, and sewing as well as gardening, bee, and chicken keeping.

Thank you for letting me share the stops we went to at this year’s urban homestead tour.  I hope you enjoyed it.  I can’t wait until next year!  This was so fun for our whole family.

Make sure to check out the photos of the other stops in Part I and Part II.

Categories: Beekeeping, Chickens, Community, Garden, Urban Homesteading | Tags: , , , , , , | 5 Comments

2012 DBG Urban Homestead Tour – Part II

The next two stops on the Denver Botanic Gardens Urban Homestead Tour that I want to share were two of my favorites.

Lori in Aurora was growing a great variety of vegetables.  In the circle in her front drive way she had many varieties of winter squash, summer squash, cucumbers and melons.   She was very generous and gave us two good sized spaghetti squash to take home.

In her back yard, she was growing in raised beds.

Her kale and tomatoes were fantastic, and we exchanged tips on season extension and overwintering greens.

But Lori had something completely different up her sleeves.  Aeroponic gardening.  Her website explains this a lot better than I can, but basically you can grow a large amount a vegetables in a very small space in about half the time as traditional in-ground gardening.

Above is a newly planted tower garden.  It holds water in the reservoir at the bottom.  The water is pumped through the tower which both waters and oxygenates the plants.  It can be plugged in to a regular outlet or converted to solar.

Below you can see water pumping through the tower.  We lifted the lid at the very top of a full-grown tower to see.

This tower was planted July 27th.  The photo was taken September 22nd.  Look at the size of that melon in only 8 weeks!

This would be an incredible option for those wanting to grow a sizable garden in a very small space (apartment dwellers, perhaps).  Also great for those who can’t do a lot of bending.  It is all grown vertically – the tower stands about five feet tall and is on rollers.

This tower is growing greens in the heat of the summer, a tomato plant, cucumbers and heirloom watermelon all in an area of 2.5 x 2.5 feet.  The towers are a bit spendy, but they do use water and space very efficiently, and the company offers payment plans.  This was the second planting of the summer for Lori and her family in this tower.

Check out Lori’s website for more info on aeroponic growing:  DenverTowerGarden.com

Where Lori’s gardens are so compact, Brenda and David Zserdin’s garden is completely opposite.

Up in old Lakewood, the Zserdin’s are growing on a half-acre, a very eclectic and sprawling mini-Eden.   Their little white coop houses 24 chickens, a mix of Bantams and full-size hens and roosters.

Inside the coop is a tree-branch roost that runs the length of the whole left-hand wall.  On the right are nest boxes, feed and water and space to store supplies.  The Zserdin’s had to give this coop a little TLC to make it warm enough for the winter by adding insulation and heat lamps.

It’s easy to see that Brenda and David’s birds are spoiled and happy.

H and E quickly found a friend in the Zserdin’s son, who also happened to be wearing a cape that day.  They ran off to play while we toured the homestead.

Their garden is just amazing.  Lots of re-purposed materials for garden structures as well as fun decorative elements make it a joy to walk through.

I loved the pole beans growing on actual poles and walking over wooden planks, past the cukes and melons trellised on old pallet wood.

Vegetables were planted in a tractor tire, old tubs and in the ground.  We wound our way through the tomatoes to the grape vines at the back of the garden.

Rick was quick to spot the Three Sisters planting among the extensive culinary and medicinal herbs that Brenda has growing.

I was in love with the compost bin set-up they had.

Brenda and I found a lot of common ground talking about chickens, homeschooling and preserving the harvest by canning and freezing.  David and Rick hit it off too, talking wood cutting, home brewing and whatever else men talk about while their women are off discussing the merits of sand for litter in the chicken area.

David and Brenda work from home doing an embroidery and screen printing business, Flutterby Designs, as well as homeschool their children.  The Zserdin’s were very gracious hosts.  They chatted and offered snacks and drinks and made us feel completely at home, like old friends.  We exchanged phone numbers and email and are excited to count them as new ones.

Later this week, I’ll show you the last three stops that we were able to get to on the tour.  In the mean time, make sure to explore the photos I posted in Part I.

Categories: Chickens, Community, Garden, Urban Homesteading | Tags: , , , , | 3 Comments

2012 DBG Urban Homestead Tour – Part I

Two weekends ago was the first annual Denver Botanic Gardens’ Urban Homestead Tour.  I was able to go on the tour and be a community sponsor.  It was so much fun to see what others around Denver were doing at their homes.  Each home that we visited was doing something different, and I thought everyone else might be as interested as I was to see our movement moving in the Mile High City.

The first homestead that we visited were neighbors of ours… we could have walked there, but I had no idea this place existed.  We live in an urban area.  Our lot is pretty small (in fact only two of the places we visited had lots as small or smaller than ours).  So I was surprised to come upon the gem that Leigh and Diana have created in my ‘hood.

Leigh is quite the craftsman.  He built the house on the acreage (!) himself, including the above green house.  The big trees were all on the property already, but the cherry, peach, plum and apple trees were all planted by the Bray’s.

Inside the green house they are growing bananas, among many other beautiful plants that we’d never get to survive otherwise in Colorado.

The Bray’s purchased the property from an elderly neighbor (Leigh said she told him she’d never sell), they worked with the city to narrow a portion of the ditch from 20 feet wide to 8 feet wide and at the same time got a the lane behind their property turned from a road into a walking path.

The Bray’s have a large garden area.  The older garden is in the background, and a newly dug garden, for 2013 is in the foreground.

Beyond the trees is where the ditch flows.  Calling it a ditch seems silly – it’s a beautiful, clean creek banked by green grass.  They even have two bridges over it and a little row-boat.  The bee hives are on the other side.  I wish I had taken a picture of it.

The Bray’s invited my boys to use the rope swing over it; I didn’t let them, it was our first stop.  But they did take them up on the offer to play in their tree house and zip-line in the yard.

The Bray’s daughter (pictured with my little super hero-cowboys) convinced her parents to get chickens.

Leigh naturally built the coop himself.  It’s a great design; wired for brooding chicks and a heat lamp for the winter.  Egg boxes that are easily accessible and a fully enclosed run.

See that second coop in the far background?  (click on the picture for a better view).  Leigh and Diana sell the coops that Leigh makes.  They offer three fully assembled sizes to house from 2 to 12 hens, AND free delivery up to 50 miles from Denver.  They can even be rigged with solar panels to power the lights.  Check out their website: chickencoopsofcolorado.com

The next stop took us into the heart of downtown Denver.  Matt McClusky of Foodie Call Catering opened his 2500 square foot garden to visitors.

Matt is using his lot to its fullest.  I loved the hanging tomato plants all along his porch at the front of his house.

Just beyond the fence, all along the front of the house Matt has veggies growing:

If you walk around the side of the house, you’ll see how he keeps pest out of the garden and nutrients in.  My boys were totally scared of the scarecrow, and this is just one of the many compost bins I photographed on the tour.

All along the North side of Matt’s property, he was growing a lush vegetable garden.  I lost track of how many varieties, which included beautiful eggplant and broccoli plants taller than Henry.

Here you can see how he uses trellises along the fence line.

And here are more beds running the full length of his lot.

Finally, here are the super tall pole beans with a beautiful herb garden growing at the base.

The gardens and homesteads we saw on the tour were just amazing.  This is the first of three posts that I plan to share about the tour.  I’m so grateful that all the participants agreed to let me photograph and share their homesteads here, as well as opening their yards to the public.

Edit:  I mistakenly stated in my original post that the Bray family had the city ditch moved, however, the ditch was hand dug in 1863 and it has been in the same place since that time.  Instead, the Bray’s worked with the city to narrow the ditch at the corner of their property back to its original size (8 feet wide) as stated above.  I apologize for my mistake. 

Categories: Beekeeping, Chickens, Community, Garden, Urban Homesteading | Tags: , , , , | 6 Comments

September Garden Photo Tour

Time for a garden update!  I’ve had a particularly good year in the garden this year.  It’s not been without failures, but overall, I’m pretty happy.

This slideshow requires JavaScript.

I really feel like the new bed layout has done wonders for our little crops.  They’ve gotten more sun, the drip system has given them more consistent water and, as you can see by the GIANT tomatoes, they are loving it.

We’ve pulled the beets, garlic, and a few other crops, spread some finished compost and have room to start more crops.  Rotation plans are in the works for next spring.

I even peeped over the neighbor’s fence (the other neighbors).  They moved in this spring, in the rental tri-plex unit next-door.  And two of the households worked together to plant a huge garden in a tiny strip of dirt.  I’ve been so impressed with their hard work!

Want to show off your homestead?  Denver Botanic Gardens is still looking for entries for the upcoming 2012 Urban Homestead Tour on Saturday, September 22 from 10am to 4pm.  Click here for an entry form.

Categories: Food, Garden, Hugelkultur, Urban Homesteading | Tags: , , , | 6 Comments

Seed Saving: Kohlrabi

I’ve mentioned before that we grow a variety of kohlrabi that get very large without getting woody.  The seeds are from Slovakia, Rick’s grandfather brings them to us.  Because we’ve never found this variety of kohlrabi in a seed catalog or garden center, and because Rick’s grandparents don’t go back to Slovakia regularly anymore, I decided that I better figure out how to save kohlrabi seeds.

Kohlrabi is a biennial, meaning it won’t go to seed until its second year of life.  Which meant in order for us to gather seeds, we’d need to keep it alive during the winter.  Last fall I left five large, healthy, likely looking candidates in the ground.  I imagined that I’d heavily mulch them with straw or leaves or something, but I never got around to it before the snow came.  So we took our chances.

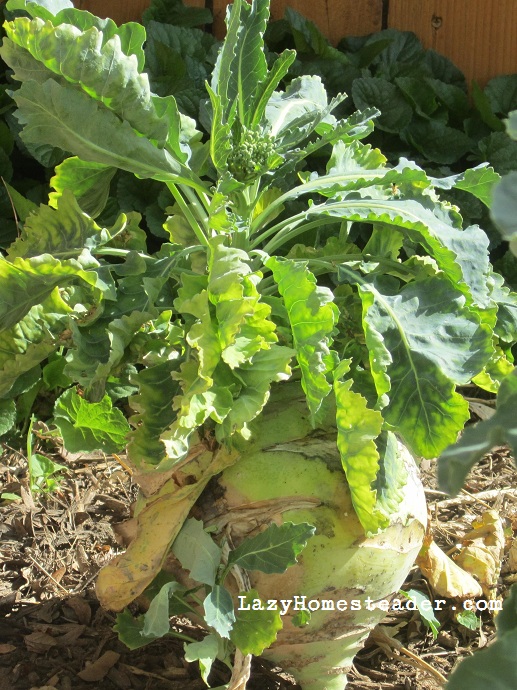
Spring came and the kohlrabi looked a little sad.  The leaves were very droopy.  Some of the smaller ones didn’t make it at all.  But by April, the three largest looked like this:

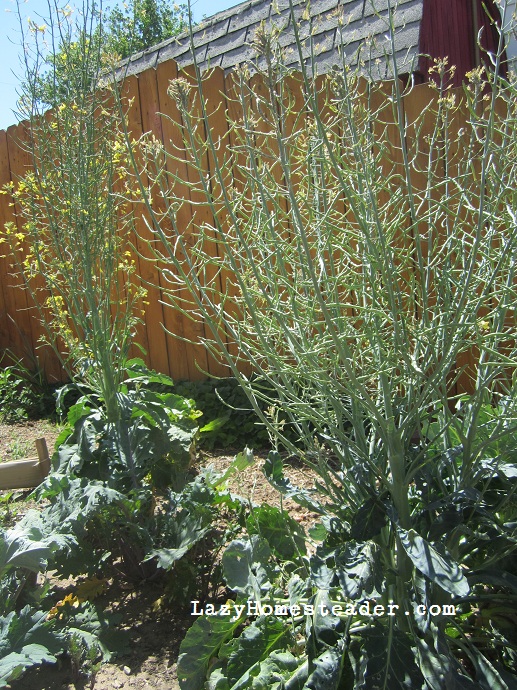
As they continued to grow, they cannibalized their bulbs and sent up great big stalks.

By May they had grown flowers.  Yellow ones.

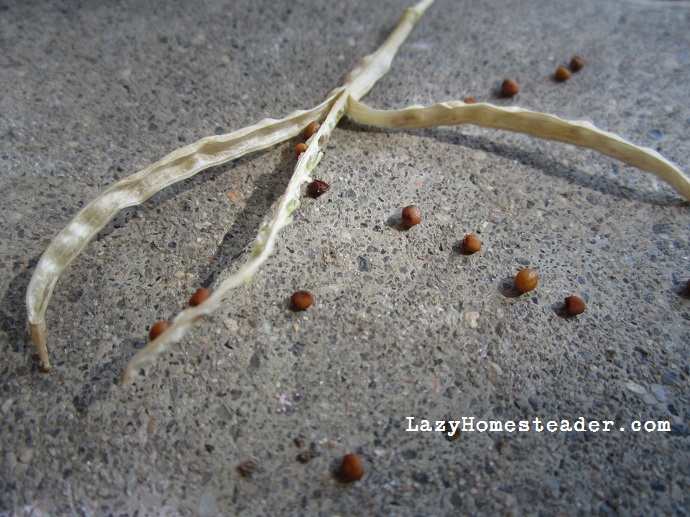
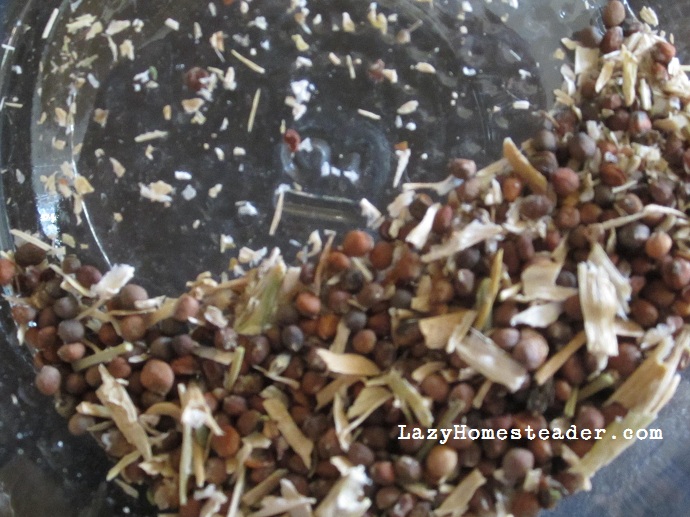
At the end of June they were setting seeds.

In July the pods started to dry and the birds started pecking away.  I was pretty nervous about losing everything that I’d been keeping alive for two years.

But I held out a little longer and when most of the pods were brown, I cut the stalks off and took them to the garage to dry completely.

And I am happy to report success in saving our first seeds ever.

I’m still working on separating them from the chaff.  I’m sure there’s a better way than what we’re doing… there has to be.  But I am very pleased that we will still have these special seeds.

Have you saved seed before?  Do you have a trick for separating the seeds from the chaff?

Categories: Garden, Sustainability, Urban Homesteading | Tags: , , , , | 17 Comments

When to Harvest Garlic

If you follow me on Facebook, you know that last week I harvested our garlic.   This was our second year planting garlic and it has become on of my favorite crops to grow and harvest.   Garlic is so incredibly easy.

In the fall, you plant your garlic cloves, cover them and then just wait.  When spring hits, your hardnecks will send up scapes.  Cut those babies off; they make a delicious dish, and cutting your scapes will force the garlic plant to put its energy into making a bulb instead of a flower.  Trust me.  Cut the scape.  This year, I missed about three scapes, and here are the garlic heads to compare.

These two heads of garlic are the same variety.  The one on the left had the scape cut off, but the one on the right got overlooked during scape cutting time.  Amazing difference, isn’t it.

Last year I harvested my garlic in a fit of nesting during the pouring rain, a mere week before C was born.  I was insanely driven to pull all the garlic right then.  It couldn’t even wait the extra day to let the soil dry from the rain.

But if you are not nesting a week before your labor, how do you know when your garlic is ready to harvest?

By looking at the leaves.

When the leaves at the bottom of the garlic plant start to turn brown and dry, your garlic is ready.  As you can see from this picture, my leaves are almost all brown.  I probably could have harvested a week or so earlier than I did, but as you might guess from all the weeds, I was sort of neglecting the garlic beds.  Not to worry, garlic will usually keep as long as it’s not an overly soggy summer.

This year we planted three different varieties of garlic; a mystery variety that I’ve been saving from our CSA farm share (Monroe) for the last couple of years, Georgian Fire, and Erik’s German White.  Judging by size alone, you can guess which has made me happiest.  I’ve yet to do the taste test.

Categories: Food, Garden | Tags: , , , | 9 Comments

Garlic Scapes Two Ways

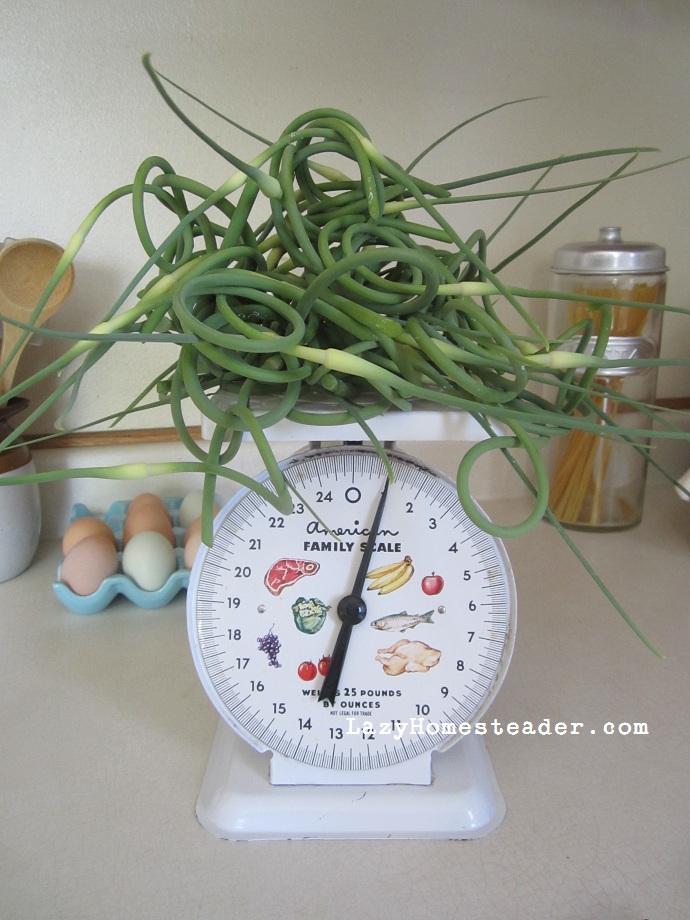
Last spring we harvested our first crop of garlic.  At that time I knew that we should cut the scapes, the flowering shoots that hard-neck garlic sends up in the spring, off of the plants so that my bulbs would reach a good size.  Once I cut them though, I didn’t quite know what to do with them.  I had heard that they were edible, but I was really uncertain on how to use them, so I ended up putting them in a vase to let them keep curling and eventually open up.  They were striking, my sister even asked to take some home.  But this year, none will be in vases.  My pallet is no longer a garlic scape virgin, and there is no going back.

I did a quick search and decided t try a couple of simple garlic scape recipes.  They are, honestly, amazing.  Checking in my cupboard, I realized that I had all the making of pesto.  I was inspired by this recipe, but used 12 scapes and added a bit of lemon juice and ground black pepper to mine.

It is honestly the best pesto I’ve ever tasted in my life.  I used my food processor, and chopped it pretty fine.  H helped me add ingredients to the food processor.  I also have to add that the olive oil we recently bought (3 gallons of it) is very fruity and I think it made a big difference in the quality of our pesto.

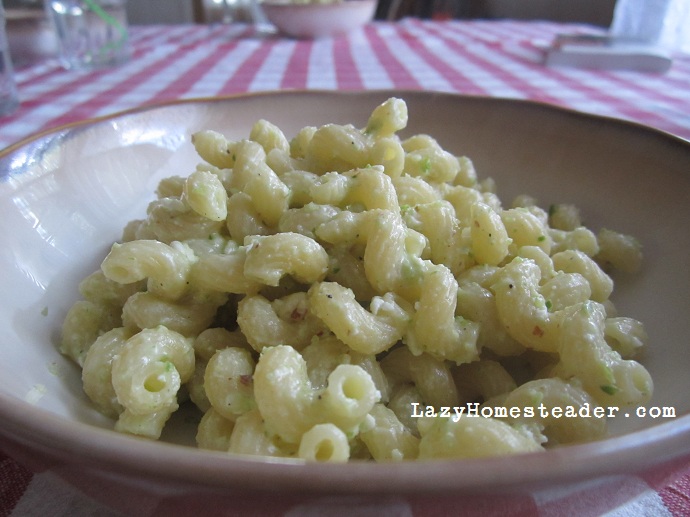
We used some of the pesto last night to make pasta.  I ran to the store to buy these curly-cue noodles in honor of the scapes, specifically for this.  For the sauce, I whisked together a good, large dollop of the pesto with about 1/3 cup crumbled feta and half a cup of the hot pasta water until it was fairly smooth.  Then I just tossed it over the pasta.

It had an initial garlicky bite that quickly mellowed and was quite delicious.  Even C loved it.  Tonight, I plan to use the pesto as a base for some homemade pizza.

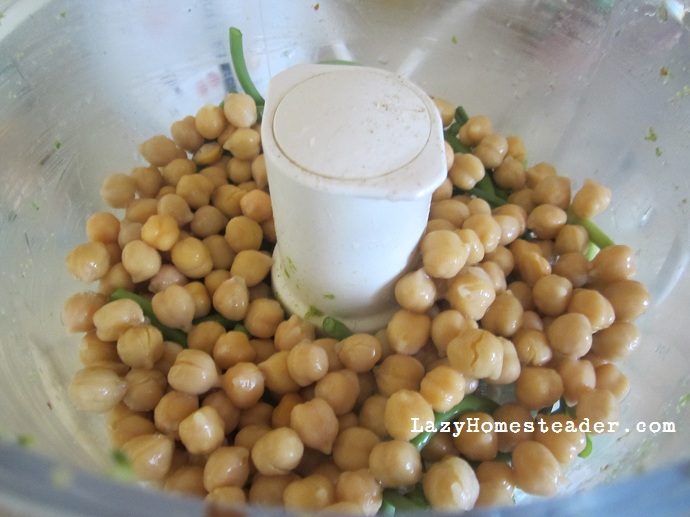
Since I already had the food processor out, I decided to whip together a quick hummus.  I didn’t even clean it out, I just added more scapes, a can of rinsed chick peas, salt, juice from the other half of the lemon, and a bit more olive oil.

It is insanely good.  I don’t know if it really qualifies as hummus, it doesn’t have tahini (which I don’t care for much), but it is so good.  I hope I can make some for a party or, crossing my finger here that I still have scapes, our next potluck.

The garlic flavor is such a highlight.  It is much more mellow than using a garlic clove, but still strong, and the color is so beautiful.

I really think garlic scapes would make an awesome addition to guacamole.  Today, I think I’ll try making a batch of garlic scape pickles.  Just the thought has me salivating.

Garlic Scapes Two Ways on Punk DomesticsGarlic Scape Hummus:

In a food processor blend:

12 garlic scapes, roughly chopped
1 can garbanzo beans, drained and rinsed
juice from 1/2 a lemon
salt to taste

When everything is well combined, add 1/3 – 1/2 cup olive oil in a thin stream while the food processor is running.

Pasta with Feta-Garlic Scape Pesto Sauce:

1 lb of pasta
1/3 to 1/2 cup crumbled feta cheese
1/4 – 1/3 cup garlic scape pesto (link above, made with lemon juice)
salt

Cook pasta in salted water according to package directions.  Reserve 1/2 cup of the pasta water before draining.  In a bowl, whisk together the hot pasta water with the feta and pesto until smooth.  Toss over drained pasta and serve.

*Any leftover pesto or hummus (yeah, right) can be frozen.  Simply put pesto in ice cube trays or a freezer bag (flat).  Defrost hummus in fridge overnight and stir in a little olive oil to bring back the creamy consistency.

Categories: Canning and Food Preservation, Food, Garden, Recipes | Tags: , , , | 25 Comments

Create a free website or blog at WordPress.com.