Posts Tagged With: Sustainability

Tips for Using Your Push Mower

I realize that in some parts of the country, there is still snow on the ground.  Down here in central Texas, though, I just finished mowing the lawn for the second time.  Whew!  I’m grateful that our backyard here is modest, since even this “mild” spring weather is hot to me.

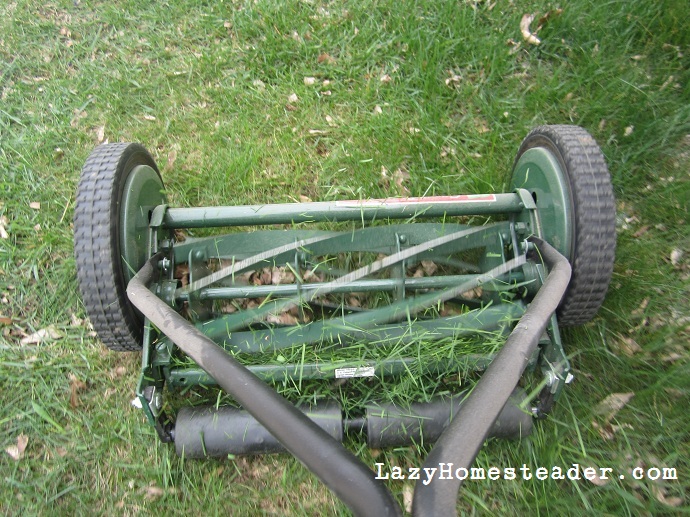
Here are some tips in case you are new to using a push-reel mower and finding it difficult.

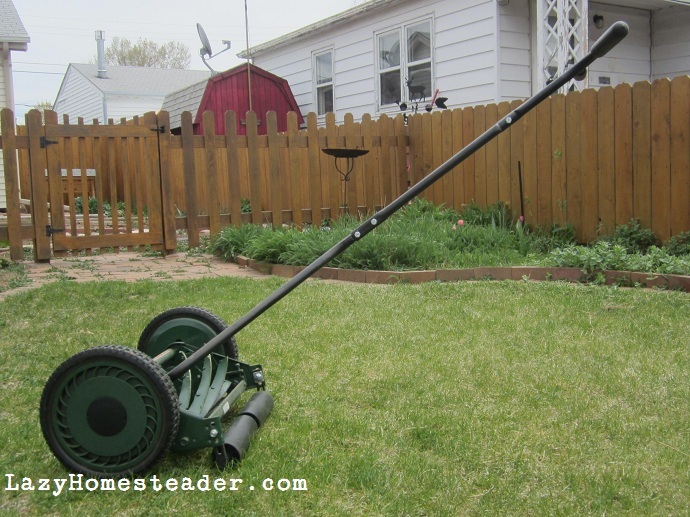
Push mower

1. Clean the yard first.  Our power mower could chop up sticks, but twigs will get caught in the reel of the push mower, bringing you to a stop and you’ll have to reverse the blades to get it out before you continue mowing.  Frequent starts and stops require a lot more energy than maintaining momentum.  A few minutes spent looking for sticks and rocks and small kids’ toys, anything that might get caught in the mower’s blades, and removing them from the grass before you get started is time well spent.

2.  Set your blades higher.  Longer grass uses less water, and higher blades will promote that, taking just a little off the top.  If you cut the grass shorter, it might need more passes of the mower, which can double (or more) the time you spend mowing.

3.  Mow more often.  While longer grass is good for water conservation, let it get too long and you’ll have trouble getting the push mower through it at all.  This is especially true of thick lawns or lawns with hills.  Our new lawn has a bit of a rise in one area and that grass is harder to mow.  If we were to “let it go” it would be very difficult to cut with the push mower.

4.  Use a trimmer for the edges.  I’ve had a  hard time getting the push mower to do a good job cutting the grass at the edges of the lawn where it meets with the fence or the patio.  Instead of struggling over those areas over and over, I just mow as close as I can and then clean up the edges with the trimmer.

5.  Mow in sections.  Our front yard here is about the same size as it was in Colorado, but the grass here is thick and harder to get the mower through.  It makes the job tough for me in the heat (I know!  Wimpy Colorado girl in Texas!).  Instead of sweating my way through the whole job at once, I break it into two or three more manageable chunks.  The mower is lightweight so it’s no big deal to walk it back to the backyard while I take a break, get a drink or water my garlic.  Then after I’m refreshed, I take on the next section of lawn.  I can still get the job done, both front and back yards, in under an hour including the breaks.

Categories: Simple Living, Sustainability, Top 5 | Tags: , , , , , , , , | 1 Comment

Seed Saving: Kohlrabi

I’ve mentioned before that we grow a variety of kohlrabi that get very large without getting woody.  The seeds are from Slovakia, Rick’s grandfather brings them to us.  Because we’ve never found this variety of kohlrabi in a seed catalog or garden center, and because Rick’s grandparents don’t go back to Slovakia regularly anymore, I decided that I better figure out how to save kohlrabi seeds.

Kohlrabi is a biennial, meaning it won’t go to seed until its second year of life.  Which meant in order for us to gather seeds, we’d need to keep it alive during the winter.  Last fall I left five large, healthy, likely looking candidates in the ground.  I imagined that I’d heavily mulch them with straw or leaves or something, but I never got around to it before the snow came.  So we took our chances.

Spring came and the kohlrabi looked a little sad.  The leaves were very droopy.  Some of the smaller ones didn’t make it at all.  But by April, the three largest looked like this:

As they continued to grow, they cannibalized their bulbs and sent up great big stalks.

By May they had grown flowers.  Yellow ones.

At the end of June they were setting seeds.

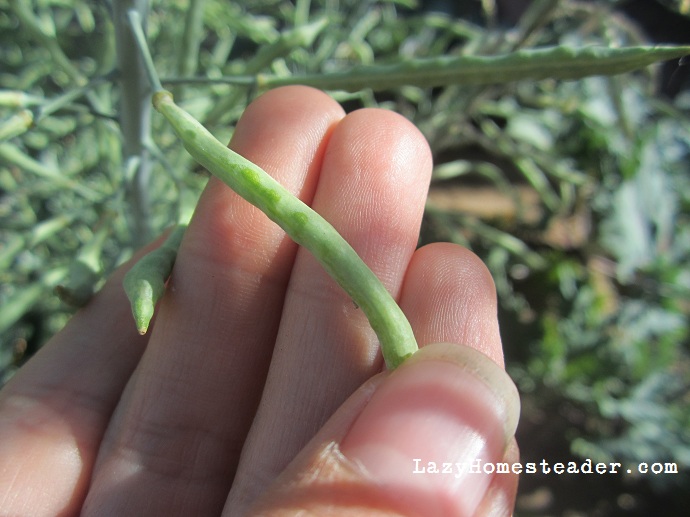
In July the pods started to dry and the birds started pecking away.  I was pretty nervous about losing everything that I’d been keeping alive for two years.

But I held out a little longer and when most of the pods were brown, I cut the stalks off and took them to the garage to dry completely.

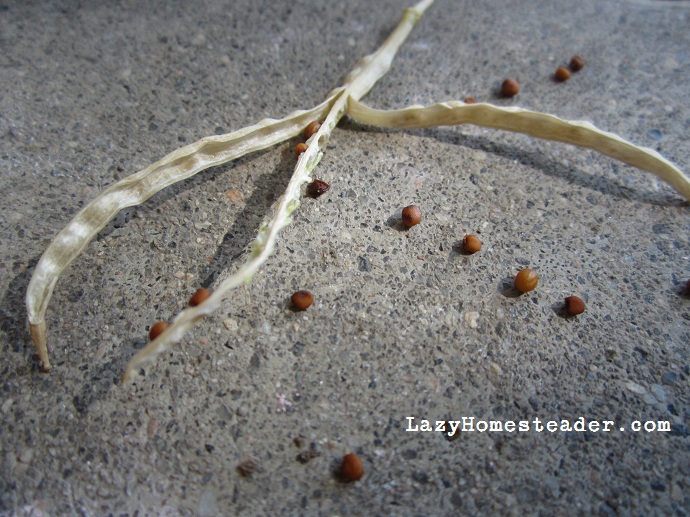
And I am happy to report success in saving our first seeds ever.

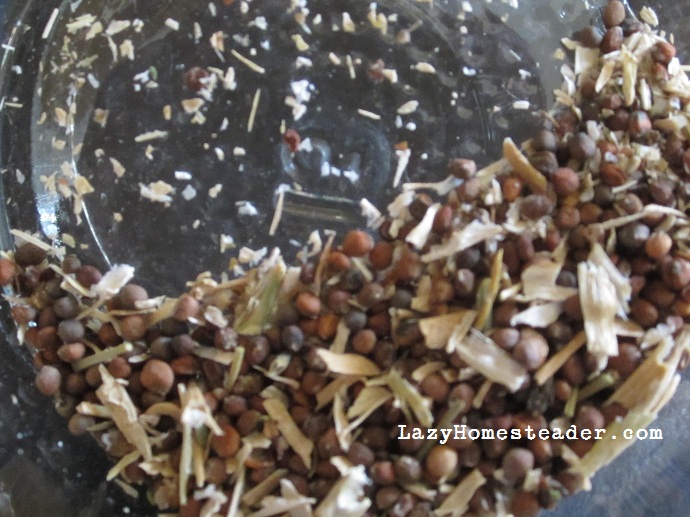
I’m still working on separating them from the chaff.  I’m sure there’s a better way than what we’re doing… there has to be.  But I am very pleased that we will still have these special seeds.

Have you saved seed before?  Do you have a trick for separating the seeds from the chaff?

Categories: Garden, Sustainability, Urban Homesteading | Tags: , , , , | 17 Comments

Thinking Outside the [Ice] Box

Someone recently asked me how the fridge experiment was going, and I realized that I missed the anniversary of when we first unplugged!  To me, that’s a pretty good sign that the project is going well.  The anniversary came and went totally unnoticed.  I imagined (a year ago) that I’d want some sort of fanfare or some official celebration, but I realize that it is better this way.

Running our home without a fridge has become so much a part of our lives that it’s almost mundane to us.  I forget about it completely until someone asks.

Changing ice jugs is routine.  Although we eat mainly fresh food, I don’t shop daily as many people have asked (I have three kids, people, are you nuts!??!), we love dairy (we regularly have milk, yogurt, cheese, half and half and butter in there), and none of us have suffered from Listeria.

Is it for everyone?  Well… I think that if we can do it with three children, probably most other families could too, certainly most single people.  But I realize that living without a fridge in 2012 is pretty far on the other side of the extreme line for many people.  It hasn’t really been an inconvenience for us at all.

I think the key to making it successful for us has been thinking outside of the box.  Many people we’ve talked to about it say they like the idea, but they could never do it because they prefer fresh food too much or that it’s not possible in an urban environment.  We are doing it in Denver and eating fresh foods (including meat and dairy)!  It is basically like using a cooler when camping. We’ve even gone out of town and left it.

Of course it would not be practical for us at all if we did not have the freezer in the garage where we could regularly get ice jugs.  But we run the freezer regardless.

So how long will we keep going?  Right now, we don’t see a reason to stop.  The only question now is what to do with the refrigerator?  Use it for storage for things prone to pests, like flour?  Make a pantry out of it?  A china cupboard? Long-term food storage area for the zombie apocalypse?  Fireproof safe?

We’re currently taking suggestions on that one.

Categories: Food, Sustainability, Unplugging the Fridge | Tags: , , , , , , | 19 Comments

Pros and Cons of a Push-Reel Mower

Like many people around the country last week, we mowed our lawn for the first time this season.  The difference between us and our neighbors, however, is I talked on the phone while I did it.

We have a push-reel mower.

Last summer, I sold my husband’s shiny, red, super-charged, front-wheel-drive, 9 billion horsepower, mulching power mower for this little green machine powered by ye ole chevrolegs.

Now I love this thing, and truth be told, Rick hates it.  He teases me all the time about how I’m saving approximately 6 gallons of gas a year.  If that.  And, pretty much, he leaves the mowing to me now, where before it used to be solely his domain.  I think he’s embarrassed.  But I like it anyway.

In case you have been considering getting one yourself, here are the pros and cons (yes, there are some) of a push-reel mower…

The top five things I love about the push-reel mower:

  1. It’s quiet.  I really did talk on the phone while I was mowing the lawn last week.  My mom asked me, what that sound was, and I said, “Oh, I’m mowing the lawn.”  Then we both laughed.  I was talking on the phone while mowing the lawn.  Preposterous!  I could mow at six in the morning or ten at night and the neighbors would never know.  It’s the stealth mower.  I actually like the sound it makes.
  2. It uses no fuel or oil and takes little to no maintenance.  By the time my neighbor is done checking his oil and fuel and pumping and priming, reconnecting the spark plug and whatever else, I’m ¾ the way done mowing my lawn.  One time, no joke, with the old power mower I stood outside for like 15 minutes trying to start the thing before I realized the spark plug was disconnected (hubby did this for safety’s sake).  The neighbor had to come over and point it out. 
  3. It’s lightweight.  All the power it uses comes from your legs and arms pushing this machine; it’s easy to maneuver and I can easily lift it up the couple of steps to our front yard and takes up very little space in the garage.  With the old machine, I could barely get it up the steps, and had to go up all backwards and strategic.  It was super heavy and could chop off my arm – the little label on the side said so.
  4. There is NO string pulling to start it up.
  5. There is no exhaust.  No stinky fumes makes me feel all green and hip and environmentally conscious.  And also the lack of fumes keeps me from feeling sick.  I know six gallons (or whatever) of gas per year is not much, but I don’t mind mowing the lawn now, because I don’t get a headache from the noise/fume combo.

Five things I don’t love:

  1. You can’t mow over sticks.  The power mower mulched and could chop up a stick or a twig that had fallen from the tree in the front yard, but the push mower can’t.  I send the boys out in the yard before I mow with the mission to pick up all the sticks.  If I accidentally mow over a stick, I have to stop to get it out of the mower, because it will jam the blades.
  2. Sharpening the blades will be a challenge.  Not many places know how to sharpen the blades of a push-reel mower anymore, and those who do charge a lot for it – almost as much as the mower cost.  Since the blades will stay sharp a long time though, we at least have a while to learn how to do it ourselves.
  3. It doesn’t always get every piece of grass in one pass.  Because of this, it is really important to overlap or mow two ways.  Otherwise your lawn looks like it’s received a haircut from a barber half in the bag.
  4. The neighbors look at us funny.  When I first bought the mower, I thought people would think we were so cool – all hip and eco-friendly.  Turns out, they either think we are crazy or too poor for a “real” mower.  Hmm… this must be why Rick is embarrassed to use it.
  5. You can’t be a lazy lawn keeper.  If your grass gets too long, the push mower is a real bear to use.  In fact, there was a time last summer, when we first got the mower, that we had to borrow our neighbor’s power mower because we had waited a couple of weeks too long to mow and the push mower, literally, couldn’t cut it.  Lesson learned.

I feel like the push mower and the power mower take about the same amount of physical effort to use.  The push mower is all pushing, which isn’t that much work (hey if I can handle that giant cart thingy at Target I can handle the mower).  The power mower took more effort for me in the starting, holding down the lever thing, and then holding it back from running my flowers down (since it pulled itself).  I think the trade-off of putting the kids on stick patrol and enduring funny looks is a pretty good one.  Plus, I can catch up with my mom on the phone while I’m at it.  😉

Categories: Simple Living, Sustainability, Top 5 | Tags: , , , , , , | 42 Comments

March Independence Days Update

Wow – here it is the middle of April, and I’m just now getting to the March update.  Yikes!

March was a great month, garden speaking.  I actually got my spring garden in on time!  I planted a lot really, and am happy to report that potatoes, peas, beets, kale, spinach and arugula are all up already.  Some of my lettuce didn’t come up so I’m thinking I’ll have to replant it.

A switch must have flipped for the chickens, since March 1st, we’ve collected 99 eggs.  Ninety-nine!

Plant Something:  Potatoes, Alaskan sugar peas, blue curled kale and red Russian kale, yellow cylindrical beets, Ringmaster onions, spinach, arugula, Boston lettuce, red romaine, Tom Thumb lettuce, Little Gem lettuce, peas and oats cover crop blend in the chicken area.

Harvest Something: Eggs: 99!!  Enough spinach for a pizza and for Emmett to graze on.

Preserve Something:  Froze 1# pizza dough.


Waste Not: Scraps given to chickens and/or compost pile.

Want Not: At the beginning of March, we bought a case of pasta, and at the end of the month we ordered some olive oil in bulk.  Also, the neighbor gave us steel posts so we could get started on the last run of the fence, and two old rusty iron tractor seats that we plan to turn into a garden bench.

Eat the Food:  From the Pantry we’ve eaten peach preserves, peanut butter, strawberry jam, pasta, nuts, plum lavender jam, the last of the dried tomatoes and  pickles, pickles, pickles.  From the freezer: elk flat steak, bell peppers, tomatoes, corn, black bean burgers, peaches, elk back strap, turkey stock, and pizza dough.

Build Community:  In March, we hosted our second potluck and a seed swap.  It was great to get to know friends a bit better and I got some new seeds (peas, cilantro and hollyhocks).  We helped the neighbor get started on a new raised bed in his front yard.

Skill Up: Our neighbor showed Rick how to properly sand and paint steel posts.  

We are headed into one of the busiest times of the year for homesteaders.  The planting season is in full swing.  We had the warmest March I can remember, not one drop of precipitation in what is normally Colorado’s snowiest month, and it is being followed by a chilly April so far.  But everything seems to be growing well, and I’ve certainly gotten the planting itch!

How are things coming along at your homestead?

Categories: Independence Days, Sustainability, Urban Homesteading | Tags: , , | 5 Comments

Remedial Composting

When I did my composting boot camp posts we were under a few feet of snow here in Denver.  I was unable to get outside and get any useful pictures of the compost bin in progress for you.  But over the last two weekends, mother nature has been much more cooperative.  We were able to get out to the bins, and coupled with the spring garden cleaning we did, we had plenty of stuff to add to it.

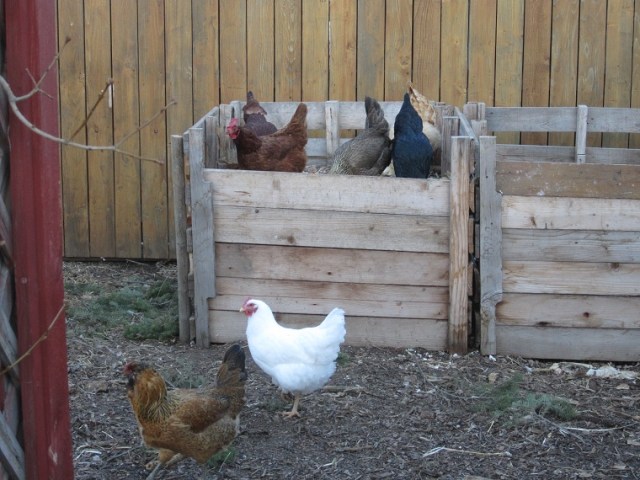
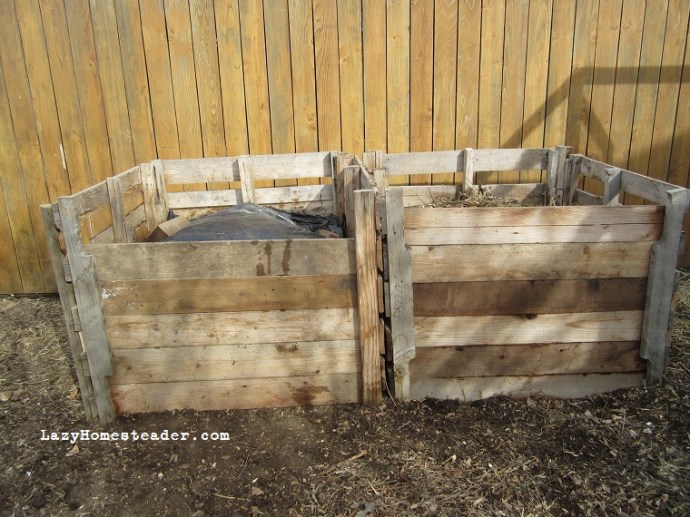
Both bins were pretty full.  The bin on the right had been covered, and I was hoping that it would be full of finished compost, ready to go.

Instead, it was nearly done.  But there were a lot of sticks and twigs in it from the tree last summer that hadn’t broken down yet.  Rick raked it all out of the bin, while Henry and I collected as many sticks as we could.  The plan is to power compost this stuff so it’ll be ready to go into beds by April or early May.

Here is a close up of that almost ready compost:

It looked pretty good, but there were still a lot of big pieces that I wanted to get broken down before we put it in the garden.

The left side of the bin is where we added our kitchen scraps all winter, fall garden materials and sod this spring that we removed from the edges of our flower and herb beds where it was encroaching.  We didn’t turn the pile over the winter at all, and it had many fabulous layers.

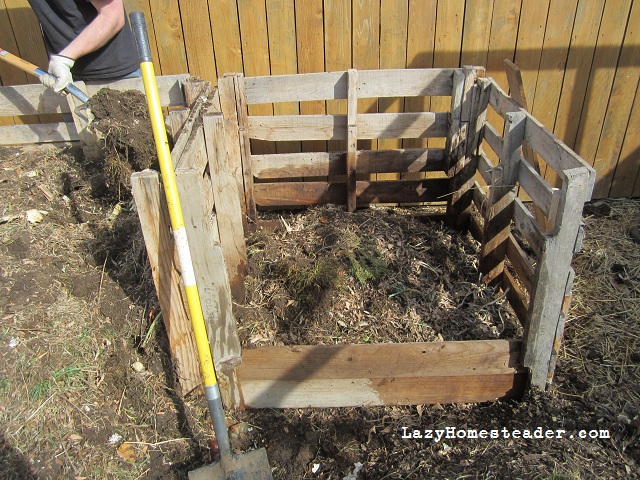
See all that beautiful finished compost at the bottom?  That is what I want!  But there is an awful lot of other stuff on top of it.  So we used the now empty bin on the right side to mix up the stuff on the left side all the way down to the finished stuff, which we will keep separate.

We started moving it over…

Not pictured is a bunch of dried grass and leaves and yard clippings that will get mixed in with the layers.  It’s off to the left of the frame.  We had more stuff than we could immediately fit into the bins without doing this process first.

So we tossed part of that top layer of grass and sod into the empty bin on the right, and part of it got tossed in front of the bin, so we could mix in other layers too.  As we moved layers over, we had H grab big armfuls of dry leaves and dry grass to mix in with the stuff coming from the left bin.

As the right-hand-side pile grew, we put the front boards back in to keep it contained.

We watered the pile with the hose as we went.  Remember, it takes water, air, carbon (browns) and nitrogen (greens) to make a great compost pile.  It was a hot day and the week was supposed to be plenty hot, so I wasn’t worried about making it too wet.

Where the layers were already very wet from the winter snows, we added lots of dry stuff.  If anything was too big, we tried to break it up as well.  The layer from last year’s garden was pretty wet, so it was good to mix in some dry brown material as we went. We were trying to balance it out. 

Also as we got to the middle layers we mixed in some of that first stuff that went over the side of the bin.  The idea it to get it somewhat uniform, so it all rots together, as opposed to the layers we originally had.

You never know what you’ll find in your compost bin.  I found this perfectly grown beet with a weird, crunchy, light-starved top.  It grew somewhere, way down in the pile.

We continued layering and watering and mixing and putting the boards of the compost bin back up until we had reached that finished compost down at the bottom of the left bin.  Then we pulled all that great, finished compost out of the bottom of the bin.

Now we had two piles.  Finished compost on the left, nearly finished compost on the right, and an empty bin.

We could use all that compost on the left, but I really didn’t have a place ready for it yet.  I decided to layer it back in with the nearly done stuff on the right with some of the top soil that we had from the bed edging.

Rick and I grabbed shovels and tossed both piles into the empty bin.

We watered it and then covered it with heavy black plastic. Over the next few weeks, it should cook down to great, useable compost ready to feed this springs’ gardens.

We did all of this work on the 11th.  I’ve checked the left-hand bin pretty regularly. Some days I uncover it and watered it; I’ve mixed it again once with a rake and my hands (so I could feel how wet and warm it was/wasn’t) since then already.  I want to keep it hot and damp, but not too wet.  Like a wrung out sponge or chocolate cake.  We’ve been adding our kitchen scraps and other yard waste to the bin on the right.

That is what composting looks like in action… the down and dirty work of spring cleaning.  😉

Categories: Compost, Sustainability, Urban Homesteading | Tags: , , , , , | 24 Comments

Practical Ways to Store Food without a Fridge

Over the last couple of weeks there has been an article from treehugger.com floating around Facebook, Reddit, and Pinterest highlighting Korean designer, Jihyun Ryou’s five creative ways to store food without a fridge.  The designer’s goal was “re-introducing and re-evaluating traditional oral knowledge of food, which is closer to nature,” by using objects to make this knowledge visible.  The designs are super modern looking with clean lines and things like sand and water mounted to your wall.  And, I have to admit, they do look cool, despite being kind of impractical.

In light of their impracticality, and because we’ve lived without a fridge for the last 9 months, I’m offering up some practical answers to Ryou’s modern artworks; while less artistic, everyday homesteaders can apply them to their own kitchens.

Symbiosis of apple and potato:

Most fruits don’t need to be stored in the refrigerator.  The taste of tomatoes will rapidly deteriorate in the fridge.  The fridge stops the process of ripening fruits, which if you are buying them from the store is the opposite of what you want.  Potatoes don’t need refrigeration either.  As Ryou points out, potatoes can be kept from sprouting if stored underneath apples, since apples, like many fruits, emit ethylene gas.  Ryou’s design offers a wall mounted box to store your potatoes underneath a shelf to set your apples on.

My mom had one of these hanging produce baskets.  You could do a quick search on Amazon and find a multitude of both hanging and counter-top baskets, and even some bins in which you could keep your potatoes stored beneath your apples. Some of them are pretty cool looking.

Verticality of Root Vegetables:

Ryou’s design is quite beautiful with carrots and green onions sticking out of wet sand (again wall mounted; I’m wondering how heavy these things are).  Here is my solution for keeping vegetables both vertical and moist:

We used this clever design for carrots, onions and celery from the CSA last summer.  Turnips, beets and radishes could go in a bowl.  And a sink filled with cold water will revive a head of lettuce that you thought was a goner too.

Breathing of Eggs:

Many people know that eggs don’t need to be refrigerated.  In Europe, eggs are purchased from a plain old unrefrigerated shelf in the grocery.  Without a fridge, eggs from the grocery store will last about three weeks.  Because egg shells are porous, Ryou offers another reason to keep them from the fridge:

An egg has millions of holes in its shell. It absorbs the odour and substance around itself very easily. This creates a bad taste if it’s kept in the fridge with other food ingredients. This shelf provides a place for eggs outside of the fridge. Also the freshness of eggs can be tested in the water. The fresher they are, the further they sink.

We use this to keep our eggs on the counter.

I’ve been told the eggs at the store can be up to 30 days old already when you buy them, so imagine how long fresh eggs from the back yard would last.  Of course, our eggs rarely make it more than a few days before they are eaten, so we don’t worry about testing their freshness, but I could easily get a glass of water to test them in if needed.

The Dryness of Spices:

Ryou’s design for  a spice bottle is really very clever.  It takes the grandmother’s tradition of keeping some grains of rice in your spices to absorb moisture to keep it from clumping one step further by keeping the rice in its own compartment within the jar.  We don’t really have this problem in Colorado, it is not ever humid enough to make our spices clump.  The only fault I find with this design is that it is once again on a wall mounted shelf.  Spices actually lose flavor when exposed to the light.  It is better to keep them in a cabinet behind closed doors where they can stay in the dark.

Note that this is not my spice cabinet (though I might wish it was).  Thanks to Louise at My Food Voice  for sharing.  My spice cabinet is a jumbled mess, not fit for photography.  😉

Now, of course, I know that Ryou’s designs are meant to be art, not necessarily practical.  But the purpose of this art besides being beautiful, and the purpose of Ryou’s project, is to get people to see (and therefore think about and use) their food and to think outside of the ice box when it comes to storing it.

What are some other ways to keep food fresh without of the fridge?

Categories: Simple Living, Top 5, Unplugging the Fridge, Urban Homesteading | Tags: , , , , | 17 Comments

Green Cleaners in the Kitchen

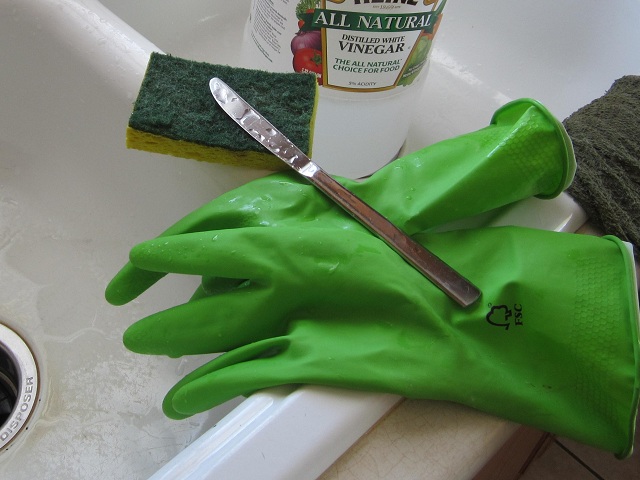
The kitchen is the urban homestead’s work horse.  And boy do I ever give my old porcelain sink a workout.  It gets pretty stained and dingy and needs a good deep cleaning every week.  Like the bathroom, I basically use white vinegar and baking soda to get the job done.

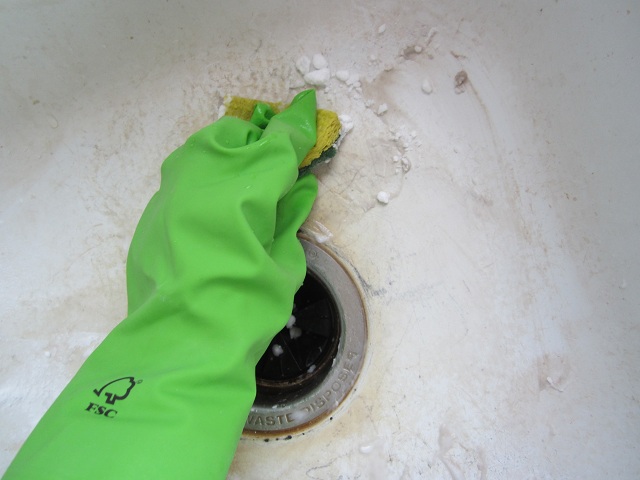
I start by rinsing the sink, and then I sprinkle baking soda in (again, like many people use Comet).  I drink coffee and my sink gets easily stained.  I grab a sponge and start scrubbing.  Baking soda is actually pretty abrasive and it cuts odors.  Just a little water on your sponge makes this pretty effective.

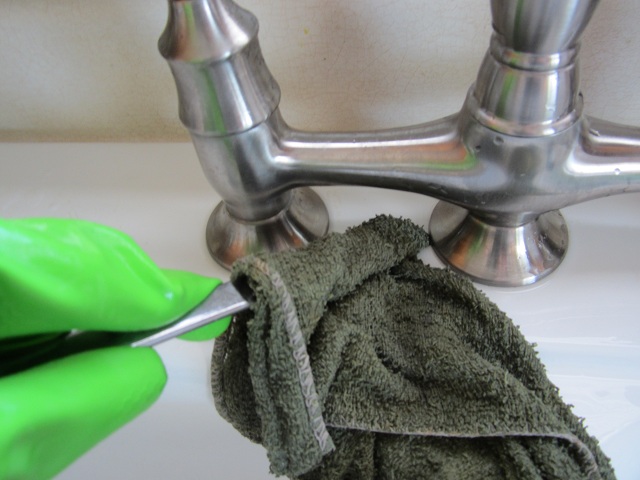
After the scrub down, I rinse the sink again, plug it and pour in a little white vinegar to take care of any staining that I couldn’t get with the baking soda.  I leave it to soak there while I take care of the back of the sink.  I use a butter knife wrapped in a dishcloth with a little baking soda to get the edges and hard to reach places.

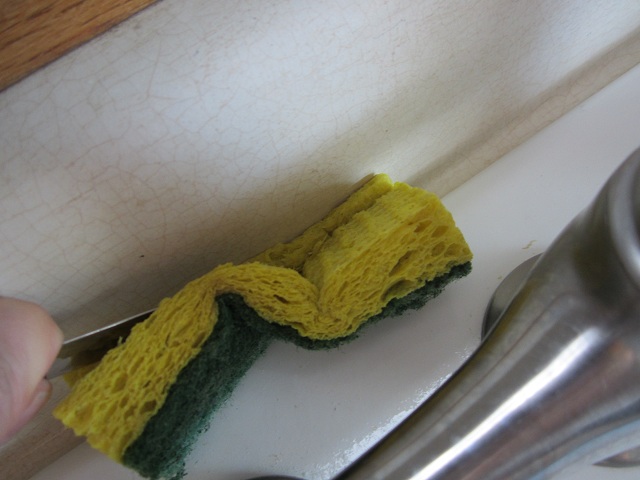
Or for areas that need more muscle, I use a knife/sponge combo.  Like the crack between the sink and the wall, under the window sill.  It’s impossible to get my hand back there – the butter knife does the trick.

By the time I’m done with all of that, the vinegar has done its job in the sink.  So I drain it and move on to the rest of the kitchen.

I use baking soda to scrub my stove top, and dish soap that cuts grease to clean the back of the stove and the toaster oven.  For the counters I have vinegar mixed with water in a spray bottle that I spray over all the counters, let sit for a bit and then wipe off.

But recently, I had a stain on my counter that white vinegar couldn’t take care of.  Bleach didn’t cut it either.  It was rust from our cast iron griddle.  What got it finally was lemon juice.

Lemons are powerful.  They can cook shrimp or fish in their juice, they kill germs and bacteria, and the are amazing bleaching agents.  I have proof.  First I squeezed a bit of juice on the stain and rubbed it around.  Then I let it sit for a couple minutes.

I was afraid it wasn’t working.  I sprinkled on some baking soda.  Salt would have been better but I already had the soda out.  It made it all fizzy, and probably neutralized the acid a bit, but I wanted its scrubbing power and figured it had set there, full strength long enough.

So I scrubbed it, and scrubbed it.  And…. it worked.

Then I threw the old, dead, juice-less lemon into the garbage disposal and ran it with water to make it smell nice.  Kitchen cleaned.

What do you use to clean your kitchen?

Categories: DIY, Simple Living, Thrift, Urban Homesteading | Tags: , , , , , , | 2 Comments

Blog at WordPress.com.