DIY

Green Cleaners in the Bathroom

This week’s boot camp is about green cleaners.  Lots of urban homesteaders are into doing things with less chemicals, more frugally, and more self-reliance.  Using or making some green cleaners around the house is a great skill to add to the homesteading arsenal.

The thing is, I don’t really use any cleaners in the house.  I use good old baking soda and white vinegar, and lemon juice.  And I think these have been talked about an awful lot on the internet already.  So while I can wax on about how effective these normal household items are to clean with, I am not sure I have much new information to offer as far as ingredients go.  Here it is, none the less.

I can tell you that these things really do work in Colorado where the water is hard and full of minerals that build up on everything.  Like my shower head, all covered in calcium build-up (or is that lime scale? or…  ??):

To get that puppy clean, first I tried just straight up vinegar with a grout brush.  Which did a pretty good job.

But I kind of needed something that would stick a bit better so that the vinegar could sit and work at it for me.  I’m all for scrubbing if it means I don’t have to use CLR, but if I can not scrub, that’s even better.  So I mixed some vinegar with some corn starch.  And poured the gloopy paste all over the shower head.  And then, while I let that sit, I used some on the tub faucet that is always sticking and tough to pull the shower lever thingy on (wow – the technical terms in this post are astounding).  Then, after I got impatient, I rinsed the shower head off… pretty good, eh?

It’s not perfect or anything, and probably if I had been a little more patient, it would have been, but I think it was decent. What’s even better is the mix worked on the tub faucet puller thing.

On to the rest of the bathroom!  Here is what I use:

Like the package says, there are hundreds of uses for baking soda.  That’s why I have a huge bag of it.  In the bathroom, I use it like most people use Comet.  I use it to scrub down the sink and tiles and tub.  And it works.

So what about the throne?  Well, lots of homesteaders are either into saving water or have male persons in the house.  Or both.  And so the toilet often gets stained from letting the yellow mellow.  And in our house, that hard water alone can leave a ring.  The best cleaning tool I have for cleaning a stained toilet is a pumice stone.

The first time I used it, I was scared to death.  I thought for sure I was going to scratch the porcelain and end up with a horrid looking toilet that I was going to end up replacing.  But that was needless worry.  It worked great.  And as far as I can tell, it didn’t scratch a thing.  First I don my rubber gloves and do a scrub with the toilet brush and a flush so the water in there is clean.  I don’t put any cleaners in there.  Then I grab the pumice stone.

I scrub around the water line, in the hole and under the rim.  It gets everything off.  You can see that the corners of my stone are getting rounded off.  The stone crumbles instead of scratching the bowl.  It works.  The toilet is sparkling.  After that, I will throw a splash of vinegar in the toilet and use the toilet brush again, for good measure.  Clean as a… well, not a whistle, but you get the idea.

I also use vinegar and water mixed in a spray bottle to clean the mirror with a lint-free cloth.  And to clean the floor. And to spray down the shower walls.

How do you clean your bathroom?

Categories: DIY, Simple Living, Thrift, Urban Homesteading | Tags: , , , , , , | 8 Comments

Handmade Halloween – No Sew Pterodactyl Tutorial

Last year I posted two Halloween costume tutorials and they were a big hit.  In fact, they’ve been the biggest hits on this blog for the last month or so.  But last year, the costumes were easy.  E was a garden gnome, and H was a bat.  This year, H upped the ante – he wants to be a pterodactyl.

A pterodactyl.  Seriously.  How am I supposed to make that?!  H certainly keeps me on my toes.  Here’s what we came up with.

You’ll need:

  • a large piece of poster board
  • approx. one yard of fleece fabric (or an amount that will fit your kid’s arm-span)
  • hot glue gun and glue
  • scissors and hole-punch
  • duct tape, preferably in a fun color
  • five 9″x12″ pieces of felt in a variety of colors.  I used 2 red pieces, 2 orange pieces and 1 yellow piece.  These are not pictured.
  • a helper who wants to be a pterodactyl

Originally I was going to use spray paint to decorate the costume, but after trying it on some scraps, I decided to go with felt instead.  Just disregard that can of paint there.  😉

So, the Ptutorial:

Roll the poster board into a cone shape, centering the bottom point over your kiddos eyes and making sure he can still see.  Tape the cone so that it will be the correct size to fit his head.  This will be sort of a hat.  A cone-hat.  It’s ok if there is a little wiggle room, since you will be making ties that will be on the inside of the cone-hat.


Punch two holes in the cone-hat near your kid’s ears, using duct tape to reinforce them (the holes, not the ears).  Keep in mind that the back of the cone-hat is heavy, so the holes will need to be in a place that will keep it balanced on his head.  Also keep in mind that he has hair under the cone-hat where you are punching the holes – unless you want to give him a weird hole-punch hair cut.  Yep, that’s the way we roll.

Cut the salvage edge off your fleece.  Cut this strip in half.  Cut one half in half again, and set the other half aside.

Thread the two pieces of the first half through the holes in the cone-hat.  Knot them on the outside.  Use a piece of duct tape to secure the knots to the side of the hat, so they will be as flat as possible, but won’t slip through the holes.


Wrap the tip of the cone-hat in duct tape.  Extend the tape past the end of the cone and give it a bit of a curve.

Cut your fleece in half along the fold so that you have two relatively square pieces.  Mine were each a yard long.  Use one piece to wrap your cone-hat.  I let a bit hang over the edge in the back of the hat, so none of the poster board would show.  Use the hot glue gun to secure the fleece to the poster board, trimming off any excess fleece as needed, and making sure your curved duct tape tip pokes through the top.


Where the fleece overlaps the point on the front of the hat, fold it over and glue it to the underside of the poster board with the glue gun.

Your hat should now look like this:

Set your hat aside and have your kiddo lay down on the second piece of fleece. I took this picture and then decided to turn the fleece the other way, 90 degrees.  So the wings will be wider, rather than longer.  Make sure your kid is at the very top of the fleece, and then mark where his armpits are and cut two slits in the fleece, about two inches long.  Fleece is very stretchy, so don’t cut these too big, or too close to the edge.


About two inches in from the edges (where his hands would be) cut two more slits about an inch to an inch and a half apart for each hand.  Again, not too big, they will stretch.

Cut the bottom of the fleece into a wing shape.  Folding it in half makes it symmetrical.


Have him put his arms through the armpit holes like he was putting on a jacket, then his hands through the hand holes so that his wrists are through and he can grip the fleece in each hand.  Now, measure where his waist is and cut two small slits about two inches apart in the center of the wings.  Thread the second half of the salvaged edge strip through these holes so that the long ends can tie around your kid’s waist.

The wings should now look like this (H is holding them up – not wearing them yet):

Now, using the felt, make dinosaur-like designs to decorate your wings and hat.  This is easy, since no one knows what dinosaurs really looked like!  We did these oval, spot thingies for the back/outside of the wings.


And wavy, red and orange stripes for the front/inside of the wings and for the hat.  Attach all your felt decorations with hot glue.

Now, dress your kid in some dinosaur-hue clothing appropriate for the weather where you trick-or-treat.  We used brown pants that we already had, and a greenish shirt.  If I can track one down before the 31st, I might have him wear a yellow shirt instead, because every knows pterodactyls wear yellow shirts

Have your kiddo thread his arms through the wings, tie his belt (under his shirt), and tie on his hat.  Notice that I covered the back of the belt with a dino-spot.

Voilà – pterodactyl!

Ka-kaw, ka-kaw!

Happy Halloween!

Oh, and if you are like me, you should just buy double the fleece you need, because you are going to make the first wings too small.  But this is actually a good thing, since all pterodactyls live in family groups…

Categories: DIY, Thrift | Tags: , , , , , , | 9 Comments

Fall at the Homestead

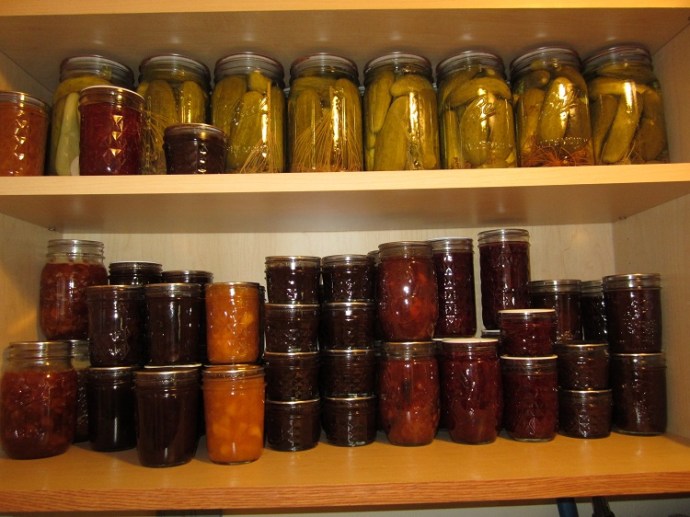
The first day of fall was last week, and we are entering one of the busiest times of the year around here.  Of course it’s harvest time – which means much of our work moves from the garden to the kitchen.  You’ve seen all my posts on jam lately, but I’ve been canning too.  A little over ten quarts of tomatoes so far, and we’re going Sunday to our CSA farm to help pick more toms and to pick and roast green chiles as well.  The tomatoes will also be canned and the chiles peeled and frozen.

I’m glad we had the CSA to fall back on this year as my tomatoes were so sad.  I was actually a bit worried.  It sure is nice to see the pantry shaping up after all.

Lots of Christmas gifts here too.

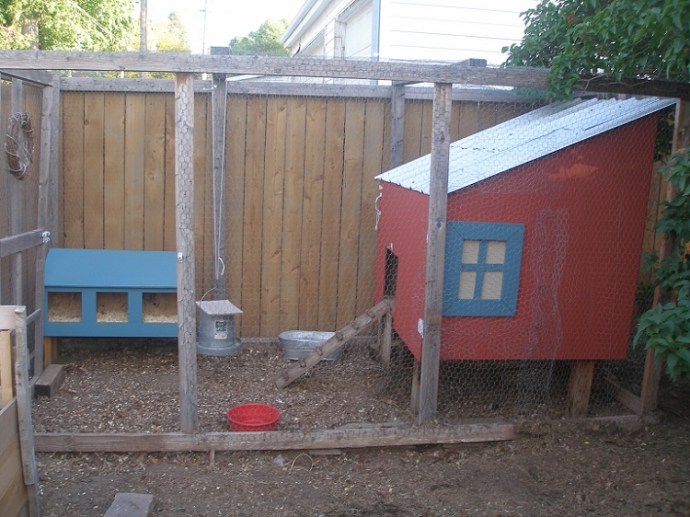
This coming weekend is the second annual chicken coop tour.  Locals can purchase tickets here or here.  We participated last year as well, and we are excited to show off again this year.  The coop had a couple of improvements this spring and summer and I really wanted everything in place for the tour. Rick bought me two galvanized garbage cans – one for the chicken food and one for finished compost, but when I started harvesting the compost, I had enough to fill both, plus half a wheel-barrow-full that I pawned off on the neighbor (it was a hard sell, trust me).  The chicken food is still in the garage for now, and there are almost two bales of straw under a tarp out there.

The hens seem excited to have straw in the coop for the first time.  We’ve always used dead leaves or pine shavings in their coop, but the “fall” part of the season has yet to happen here and we wanted to coop cleaned up for the tour.  We were hoping for some wood chips to spread over the ground before the tour too, but it looks like we’ll have to go with out.  Despite that, the chicken area looks nice.

The extra straw, not for the coop, will be used to mulch the garlic that we ordered and saved for seed.  I ordered two varieties this year and saved ten bulbs from a third.  We hope to plant around 125 cloves after the first frost hits.  That should yield us enough garlic for the year next year, including some to save for seed in 2012.

A couple of weekends ago, Rick and H put up my clothesline for me.  I was so excited to get the line that Rick’s mom had promised me.  But once we got it home, we actually couldn’t manage to get it into working order.  After fighting with it for a couple of weeks, we ended up buying a new one, and I love it!  I’ve used it everyday, but I’ve realized I need more clothes pins.  The line holds a lot, and C’s diapers (and inserts and wipes) take up all the pins I have.


We harvested our concord grapes – one whole bunch!  There would have been two bunches, but I accidentally knocked off the second bunch early on in the summer  when I was trying to get the vine on the trellis.  Not too bad for it being the vine’s first real season – we just planted the cutting last spring.  We hope to use this vine to make a few more cuttings when the pergola is done.

Speaking of the pergola, Rick’s uncle brought us down our first pieces from the mountains.  The posts are here!  We will be setting them on poured concrete footers this fall and we’ll begin laying the patio in the spring.  This was the goal of the tree removal project.  I had hoped to have it done all in one summer, but it really was a huge undertaking to manage on our own.  Not to mention having a baby this summer too.  (There’s that old excuse again!).  😉

There is a huge amount of beetle-kill pine in our forests here right now (a heart-breaking 4 million acres in Colorado and Wyoming), so we plan to build the whole pergola out of salvaged logs.  Once it’s constructed, we will plant and train grape vines over it.  I am very excited about it, but it’s been slow going.

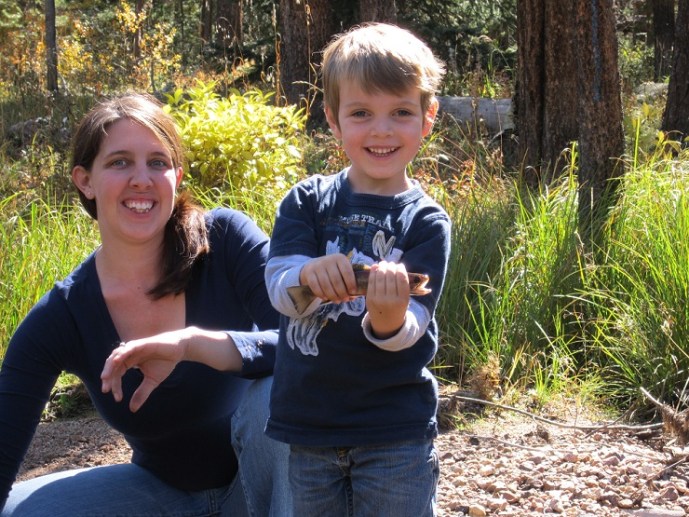
Fall is also the time when we start filling the freezer back up with meat.  We actually got a good look at the forests this year as we did some prep work for hunting season.  Rick sighted in his rifles at the range up on Highway 40, and we did a little grouse hunting and some fishing.  We were skunked on the grouse, but Henry did catch his first fish!  He let it go so it could grow up a bit.  Nothing was added to the freezer yet, but the trip was great fun anyway, and we’ve ready for big game in a couple of weeks.

So that’s what we’ve been up to lately – I’m hoping the tour participants will give us grace on the yard still being half done.  Oh well, they’re coming to see the coop, right?  😉

Categories: Canning and Food Preservation, Chickens, DIY, Garden | Tags: , , , , , , | 15 Comments

Late Summer Snapshot

It’s been almost three weeks since I’ve made it onto the computer.  I’m sure you were wondering if I had some sort of mysterious injury related to a grub hoe and a compost bin.  But I assure you, everything is fine.  The sun has been out, and things have been growing like mad, including both boys and C.  So the blog has been collecting dust!  In the mean time, I’ve been able to get a few things done around here.

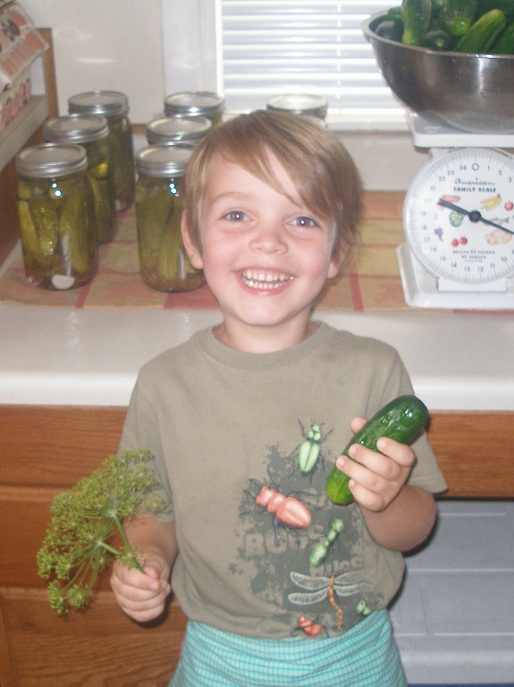
We picked cucumbers up at our CSA and put up 48 quarts of pickles.

We got the tree trunk and stump hauled away to a mill.

And we put some 7 pounds of elk meat into the dehydrator to become jerky.

We harvested corn and our first potatoes with the neighbor.

I have to say that harvesting potatoes is one of the funnest things ever – it’s like a treasure hunt!

We ended up with 40 pounds of fingerlings and 50 pounds of Desirre red potatoes!  We will have plenty for seed next year and hopefully enough to store through the winter.

We also have a neighborhood BBQ in the works and have been spreading the hens’ good will via eggs and some extra garden onions.

We are getting ready for some berry picking and peach picking in the next week or two.  I am excited to get some preserves into the pantry as well.  We are going to take a walk tomorrow to the house with the concord grape vine and see if the new family there will share some grapes with us this year like the last tenants there did.  We are bringing some 2010 jam with us to give them as an incentive!

The late summer/early fall is one of the busiest times around our homestead.  Harvests are coming in, the dehydrator is running, and we are trying to see if we can manage to get the yard back in shape in time to participate in the second annual Denver Botanic Gardens chicken coop tour.  If you remember, I made some improvements on the coop this spring with the tour in mind, and last year was a lot of fun, so it’d be really great if we can pull it together in time.   More updated posts in the coming days – I am finally getting back on the ball around here, I think.  😉

Categories: Canning and Food Preservation, Chickens, Community, DIY, Garden, Independence Days, Urban Homesteading | Tags: , , , , | 1 Comment

What We’ve Been Up To…

Sorry for the lack of posts lately.  We’ve been up to a lot.  We spent some time pulling weeds, trimming hedges, cleaning up the flower beds and mowing this weekend too, but I didn’t get a picture.  This is very sad, because it was the first time Rick used the new push mower!   Other garden news – the sunflowers and okra I planted are up and should make a nice screen soon.  But between all the projects, I’ve been pretty exhausted and have had weird hip-nerve-fire-stabbing pain going on my right side.  Because of that, I’ve been spending the boys’ nap time (my usual blog writing time) napping myself.  38 weeks pregnant and counting.  Here are some pictures of what we’ve been up to over the last couple weeks.  As always, click to view larger.

The tree stump came out:


The garden is growing:


The rest of the basement got “finished”:

The nursery got a few more touches:


Baby’s ETA is any time now.  I was 12 days early with E, and although I know I can’t count on a repeat of that goodness, I can still hope.  You can bet there will be pictures.  😉

Categories: DIY, Garden, Hugelkultur, Simple Living | Tags: , , , , | 1 Comment

20 Weeks: Finishing What I Started

Um, if you didn’t notice, my 20 Weeks of Organizing went to hell in a hand-basket.  Yeah.  The idea was to make a list of 20 things, one to be completed each week, and then DO THEM!   Back in March, when I started, I even gave out the rules, including, “Keep the projects small – don’t list “organize office,” that’s too broad.”

So, naturally, I put items like “# 11) Completely gut and reorganize that junk room in the basement into a guest room, while simultaneously making the former office into a nursery” on my list.

Ok, so I didn’t really.  I kept my list to the rules.  The problem is, I got ahead of myself, which gave me a couple extra weeks.  And while I really wanted to listen to the wisdom of friends, telling me to taking it easy, not get in over my head, I mentally added #11 to the list, and then proceeded to work on it.  Dummy.

Then I got overwhelmed.  The basement and it’s junk room took over our lives.  I got obsessed.  Suddenly I was on a first name basis with the donation guy at the Goodwill, I was sewing curtains, my husband moved cabinets and counter tops to the garage.  I even called my mom over for reinforcements (and then wouldn’t let her do anything), like I said, Dummy.  I scoured craigslist for shelving.  I moved and rearranged and scrubbed walls.  I painted.  I panted.  I felt like passing out and giving up.  I gave up.  Then I read this post last week by the Organizing Junkie and I got up and did a little bit more.

There is still more to do, but I am to the point where I’m calling it good enough, so I can MOVE ON with my life and maybe get something else done.

So, here is the before of my basement junk room:

Suffice it to say that the other side of this room was equal to or greater than the mess you see above.

This is the other half DURING the work:

You can see that I set up a bed, painted a wall, and found a place to store canning supplies.  Hey – canning storage was #14 on my list!  I got to cross something off!

Here is the basement today – guest room.  I still need to hang the curtains that are sitting on my sewing table in the second window, and a couple of pictures, but you get the idea.

It’s done enough.  Next week I’ll post pictures of the nursery, and then I’m getting back on the wagon.  One small, specific item, that’s actually written on the list, per week.  From now on.  Oy!  Wish me luck!

Categories: 20 Weeks of Organizing, DIY | Tags: , , , | 5 Comments

On the Ground

Well – we still have a lot of work to do, but with some muscle and a little help from the 4Runner this weekend, we finally got the tree on the ground!

After Rick got the last of the big branches down on Friday...

We cleaned up the first (and only) injury. Note: Rick is not a performer in Cirque du Soleil.

Then Saturday morning, after cutting and pulling, we hooked up the 4Runner and brought it down.

Hooray!

Categories: DIY, Garden | 1 Comment

Tree Update and My Newfound Love of Mulch!

The tree saga continues.  I had no idea when we started this project that it was going to take so long.  Of course, this spring has been unusually rainy and windy, preventing us do-it-yourselfers from safely hugging branches as we cut the tree down.  But I can see the light at the end of the tunnel.

A couple weeks ago we had a friend come help us get some of the higher up branches of the tree.  We were so grateful for Chris’ help.  He is a rock climber and used to work cutting down trees in the forest, so he came prepared with ropes and a super-light chain saw.  He cut down nearly all the top branches for us and helped Rick navigate them safely to the ground.  We have power lines on both the North and East sides of our yard, the neighbors garage on the South, and our own house to the West of the tree.  Not to mention the fence and the chicken coop.  It was quite a feat getting through that obstacle course.  Click the photos for best view.


Rick was able to get the last top branches down Memorial Day weekend on his own.  After the branches were down, I ran everything that would fit through the chipper and “finished” adding mulch to the garden.  I think I’m addicted to mulch.  It’s the first time we’ve used it and it looks so nice and defines the beds so well, and seems to be doing its job keeping weeds away (and certainly the mud!).  I’m an official mulch convert!


Now all we have left is the trunk and the main limbs.  They are huge, and will require a chainsaw, but thankfully they are out of range of the wires and other obstacles.  I’ve contacted a local mill to see about having the trunk milled into lumber.  We’re still trying to come up with a plan for the big limbs and branches though.  But… we’re almost done.  Almost.

Categories: DIY, Garden | Tags: , | 6 Comments

Create a free website or blog at WordPress.com.