Hunting

Bacon Dove Poppers and an Update

As you can tell, I’ve had a hard time keeping the blog updated lately.  I have really been enjoying Texas.  We’ve taken a few trips to the beach and we have a camping trip or two in our future as well.

Homesteading wise things have been going slow.  Very slow.  Thank goodness for the CSA shares.

The garlic I smuggled down here to S.A. with me from Denver did not make it.  I thought I would cry over it, but instead I just bitterly yanked out the plants from their pots.  Our compost bins (a tumbler set-up we bought when we got here) is awesome, though.  Full of black fly larva (!!) and cooks in just days.  It’s truly amazing.

We finally got a plot in the community garden in our neighborhood.  Its a 4’x8′ bed.  So far we have tomatoes, chard and kale planted.  It feels strange to be planting things now, but we are happy to have our hands in the dirt.

I began work on organizing a chicken coop tour here.  There was a lot of excitement generated at the beginning but it has fizzled out a bit.  The interest is really strong, but the city ordinances restrict the number of allowed chickens to three without a permit, and I had quite a few coop owners back out for fear of getting caught with too many birds.  Sound familiar Denver?  We’ll try again soon and hopefully the tour will actually happen.

Otherwise I’ve been busy with schooling the kiddos and trying to meet people, as well as checking in with friends and family to see that they are safe in all the flooding back home in Colorado (so far they all are).

Rick had a work sponsored dove hunt a couple of weeks ago.  He took H with him and they had a grand time.  H got to have is first (and second and third) soda pop.  He had two Sprites and a Coke, plus a Gatorade.  He filled up on chips and beef jerky, came home with a pocket knife (the prize for being the youngest “hunter”), a rubber copperhead snake which he found near a truck tire, a $20 bill for retrieving the birds, and a bag of spent shotgun shells, which Rick promised to pay him a nickel a shell.  He had over 200 shells.  He was the youngest of only a handful of kids there, was newly missing his front teeth, and Rick’s boss and co-workers completely spoiled him.

They brought home 8 doves and a pigeon.  Rick froze the pigeon whole and kept the wings to train our dog with later (I did tell you we got a dog, right?), and breasted out the doves.

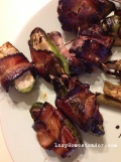
We had a nice heap of jalapenos from the CSA, so of course we made poppers.  They are simple to make, and as with all things made with bacon, delicious.  We tried some with and some without cream cheese.  I preferred them with and Rick preferred them without.  But they were good both ways.  Also in our pictures you can see a couple of bell pepper pieces in there which we used to make a mild popper for the wee kids.

Grilled Bacon Dove Jalapeno Poppers

Breasts from 8 doves (16 pieces)
8 jalapeno peppers, halved lengthwise and seeds removed
Cream Cheese (optional)
8 slices of bacon, halved
16 toothpicks

After slicing and scraping out your jalapenos, schmear each pepper with some cream cheese.  Lay one dove breast half on each pepper.  Wrap each pepper half with a half-a-slice of bacon and skewer closed with a tooth pick.  Place poppers into a grill basket, and grill over a hot fire until the bacon is done, turning often.  Keep an eye on them as the bacon fat can easily light up the coals.  Remove toothpicks and enjoy.

Categories: Hunting, Recipes | Tags: , , , , | 1 Comment

Colorado Blue Grouse Potpie

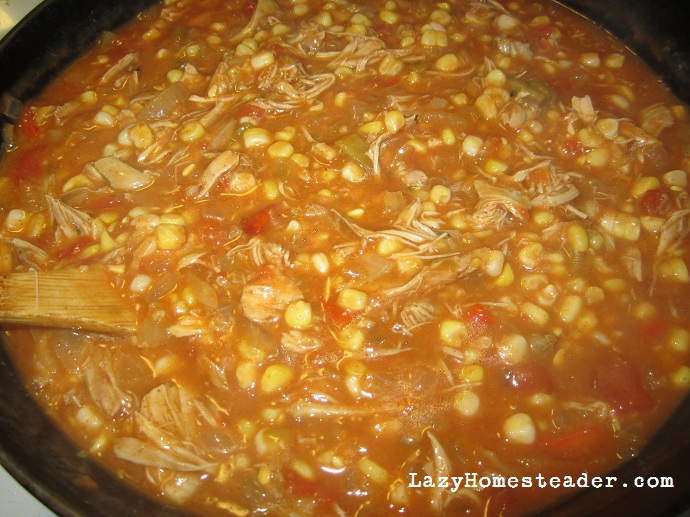
Here is another recipe from this year’s hunting trip.  It’s a potpie that I made ahead and froze so that up at the cabin, all we had to do was pop it in the oven.

This recipe was originally inspired by a chicken potpie recipe I found in my Everyday Food magazine. I use dusky (blue) grouse in this recipe, but pheasant or other upland birds would be just as tasty. You can certainly also substitute chicken or some leftover Thanksgiving turkey.

Before making this recipe, I clean and cook the grouse to make a stock. In a large pot, add the grouse, an onion (chopped), celery, garlic, parsley and salt. If you skinned your grouse, add a tablespoon or so of olive oil. Cover everything with water and simmer for an hour or more until the meat is fall-off-the-bone tender and the broth is flavorful. Remove the grouse from the pot, shred the meat, and strain the broth. I usually end up with more broth than I need for this recipe. I freeze any extra for later use.

When we make the potpie, we try to use all locally grown ingredients (with the exception of the chili powder). We use green chiles and corn frozen from our summer CSA, onions and garlic from the garden, and tomatoes we canned ourselves. I like to use hot Chimayo chili powder from New Mexico.

Colorado Blue Grouse Potpie

Ingredients:
1 homemade pie crust
1 medium yellow onion, diced
5 TBS butter
3-4 cloves of garlic minced
1 TBS chili powder
½ cup flour
28oz can of diced tomatoes (or a pint-and-a-half of home-canned tomatoes), juice reserved
4 cups grouse broth
2 cups corn kernels
5 ounces roasted, peeled green chiles, diced
Meat from a whole grouse or two, cooked and shredded
Coarse salt

For the filling:
Melt butter in a large pot or deep-sided skillet over med-high heat. Add onion and cook, stirring frequently, until soft and translucent, about 10 minutes. Add garlic and chili powder, and cook about 30 seconds until fragrant. Stir in flour and cook until all the onion is well coated. Pour in the broth and tomato juice, whisking to make sure there are no lumps of flour. Add tomatoes. Bring to a boil, reduce heat and simmer until thickened, about 10 minutes. Season with salt. Stir in corn, chiles and grouse.

Assemble the pie:
Preheat oven to 375°. On a floured work surface, roll out the pie crust to ⅛-inch thickness. Transfer filling to a 9×13 pan (or other two-quart baking dish). Top the pan with the crust, folding over the edges. With a sharp knife, cut slits in the crust.

Place the pan on a baking sheet (to catch any spills), and bake for 40-50 minutes until the crust is golden and the filling is bubbling. Remove pot pie from the oven and let cool for 15 minutes before serving.

The potpie can be assembled and frozen ahead of time. To bake from frozen, bake for 1-¼ hours at 425°.

Serves 6-8 hungry hunters.

 
Make sure to enter the Old Fed Co. “Ax Skills for the Homestead and Wilderness Survival” DVD giveaway before November 21, 2012!
Categories: Hunting, Recipes | Tags: , , , | 5 Comments

Giveaway: Ax Skills for the Homestead & Wilderness Survival DVD

A few weeks ago, I was contacted by Alex Leavens, a survival instructor in the Portland, Oregon area, asking if I would review his DVD, “Ax Skills for the Homestead & Wilderness Survival.”  He thought that my readers here might be interested in his DVD.  After checking out his website, OldFedCo.com, I agreed.

The Review:

I’ve never seen such a detailed “how-to” DVD.  Alex meticulously covers everything from safely handing an ax, chopping wood and making kindling, to sharpening your ax and replacing an ax handle.

I really loved how clear he was about safety.  The graduated 4-Her in me also couldn’t help but think that the instruction on the DVD would really help in the making of a blue ribbon, Grand Champion 4-H project.  I would be totally comfortable having Henry watch this DVD  because it is so thorough and emphasizes safety so well.  This is actually not that surprising though, since in his bio, Alex states he was an Eagle Scout.

I was totally impressed with Alex’s accuracy in splitting and reading wood.  Since it’s easy to impress a beginner, I brought Rick in to watch the DVD with me.  Rick has chopped a fair share of firewood.  He’s not an expert on axes, but he  knows a bit about sharpening tools and safety.  I wanted his point of view on the accuracy of the information presented in the DVD.

It was cool watching the chapters on sharpening and safety and hearing Rick pipe up with plenty of “Yep! That’s the way,” as well as having him tell me what he was learning as we watched.  I liked the chapters on hanging an ax (replacing the handle) because my grandpa gave Rick all of his old tools and this DVD will be a great reference tool on caring for and maintaining them.

It is obvious while watching the DVD that Alex really knows his stuff and is also passionate about teaching.  The DVD is extremely thorough.  There are great close-ups of what he’s doing to sharpen his ax, as well as shots from many different angles showing exactly what is happening and how to do it yourself.   It made me feel like I could choose and buy an ax, use it with confidence and maintain it myself.  Check out some of the clips of the DVD on Alex’s site for some examples to see what I mean.

The section on using an ax in the back country was really cool.  I liked seeing how he set himself up using what was in the woods to split wood, make kindling and make stakes.  He even shows you how to make an in-field sharpening station.  Plus, I loved that even in the woods, he was very consistent and followed all his own safety rules.

Alex makes sure to cover every aspect of one topic before moving to the next.  There is no rushing through anything, and the pace is good for a newbie.  The chapters on the DVD are organized in a logical way, and once you grasp a skill, it’s easy to skip forward on the DVD to the next skill if you are ready to do so.

In the end, while pressing the eject button on the DVD player, Rick commented that he was pretty happy to have a good reference tool on the shelf next time he needed it.  I’m excited to use some of the skills I learned about sharpening and maintaining hand tools on Vera, my grub hoe.

The Summary:

This DVD would be great for:

  • Beginners, new to homesteading and/or hand tools.
  • Those who want to add to their skill set, especially sharpening and maintaining their own tools.
  • People with a wood-burning stove or fireplace.
  • People with a giant wood pile.
  • Youth clubs like 4-H or scouts.
  • Homeschoolers interested in teaching traditional skills.
  • Survivalists, backpackers, hikers, hunters or others that spend time in the woods.
  • People interested in hand tools, restoring old tools, reusing instead of buying new, and/or geeking out with their grandpa’s hand-me-down tools.
  • People who are intimidated by using and maintaining an ax.

This DVD would not be good for:

  • Our great-grandparents who grew up learning these skills.
  • People who are into “more power” or using a chainsaw for everything.
  • People who want to do things quickly instead of correctly.

Disclosure: I received a free DVD from Alex to write this review.  The thoughts and opinions expressed here are honest and my own.

The Giveaway:

In addition to being an authority on axes, Alex is a wilderness and survival expert.  He is a former backcountry ranger, firefighter, and survival guide.  He teaches classes in the Portland area, as well as offering ax sharpening services for locals.

Did I mention generous?  Alex promised to give away a copy of the DVD to one lucky reader!   

To be entered into the contest, please post a wilderness or survival question in the comments here before midnight, MST on November 21, 2012If you are new reader here at The Lazy Homesteader, or have been lurking for a while, this is your chance to come out of the woodwork.

I’ll double your chances if you ‘Like’ Old Federal Ax Co. on Facebook and share this post with your friends (tag @The Lazy Homesteader or use one of the buttons at the bottom of this post).  Come back here to leave a second comment telling me that you did so. 

I’ll announce the winner in a separate post, so make sure to subscribe to the LazyHomesteader.com/feed or follow me by email or on Facebook/Twitter by using one of the buttons on the sidebar (above, right).

You have two weeks to enter and spread the word.  Ready, GO!

The giveaway is now closed.  Thanks to Alex and Old Federal Ax Co., and congrats to the winner!

Categories: DIY, Giveaways, Hunting, Recommended Reading, Simple Living, Urban Homesteading | Tags: , , , , , | 22 Comments

Wild Elk and Venison Jerky on Northwest Edible

From the Native Americans to The Hunger Games, people have carried jerky.  You know that if the zombie apocalypse hits, you’ll want some too.

I’m so excited that Erica at Northwest Edible Life has allowed me to do a guest post on her blog about my favorite way to preserve meat.

Rick got this recipe from his mom.  All the men in Rick’s family are big-time hunters, and my mom-in-law is the designated jerky maker for the family.  Her sons, brothers and dad all drop meat off at her house to have her transform it into this good stuff.

I’m sharing the secret recipe over at Northwest Edible.

Related articles
Categories: Canning and Food Preservation, Food, Hunting, Recipes | Tags: , , , , , | 5 Comments

Venison Stew

When Rick and I got married, though I possessed a decent degree of skill in cooking, my meals were rarely balanced (“chicken breast is dinner… what to you mean what else are we having?”).  It took some time for me to learn that a meal included more than one thing.  But there was an exception to this; soups and stews.

I grew up in a home that made soups and stews regularly.  They were a staple in my parents’ home.  Both of my parents worked outside the home, so my mom is proficient at pressure cooking which made soup an easy weeknight meal.  She is also the master of slow cooking a stew for hours to get it just right.  I used to tell people my favorite foods were easy to remember; sushi, steak and soup!  (Mom makes a mean rare rib-eye too).  It’s tradition for our family to have a big pot of potato soup on Christmas day, which keeps everyone out of the kitchen and allows us to spend time together as a family instead.

I don’t know how Rick felt about stew before we got married.  I don’t get the impression that he had it much growing up.  For me it’s soul food.  There is nothing so good as a hot, delicious soup to warm you up at the end of a long or cold day.  I think our kids feel the same way.  If you were to ask H what is favorite food is he will either tell you potato soup or chicken noodle soup – the homemade stuff – which is my favorite as well.

Naturally, having wild game in the freezer means venison stew shows up on the menu pretty often in our home.  This recipe is one that I’ve developed by marrying my mom’s beef stew with elements of a venison recipe that an ex-coworker of mine shared with me from some now-forgotten cookbook.

Venison Stew

8 slices of bacon, cut into ½-inch pieces
1 large yellow onion, diced
2 lbs venison, cut into 1-inch cubes
3-5 cloves of garlic, minced or pressed with a garlic press
12 oz beer – something you like to drink, but not Guinness
4 cups water
1 tsp dried thyme
1 tsp dried marjoram
2 dried bay leaves
1 tsp salt
¾ tsp black pepper
3 carrots, peeled and sliced into ¼-inch rounds
3-4 potatoes, peeled or not, cut into 1-inch pieces
¼ cup fresh parsley, snipped

In a 4 quart dutch oven or other large pot, cook the bacon until crisp.  Remove the bacon with a slotted spoon and save for later.  Saute the onions over medium heat in the bacon grease until translucent, about 5 minutes.  Turn the heat up to medium-high and quickly brown the venison.  Add the garlic and saute for about 30 second.  Turn the heat back to medium and add beer, water and spices including salt and pepper.  Bring to a boil, reduce heat and simmer, partially covered for about two hours.

When venison is nearly tender, add the carrots and potatoes.  Simmer, uncovered for another 20-30 minutes until the potatoes are fork-tender.  Taste for salt.  If you wish, thicken the stew by mixing 1 cup of cold water and 1/3 cup flour in a separate container and slowly add it to the stew while stirring.  Reheat the stew to boiling  for 1 minute.  Serve topped with reserved bacon and snipped parsley.

Categories: Food, Hunting, Recipes | Tags: , , , , , | 3 Comments

The Gamey Taste of Game Meat, Part II

Every so often I publish a blog post either about hunting or with a picture of an elk steak in it.  Usually after this I get at least one or two questions about how to prepare game meat so that it doesn’t taste so “gamey.”  I hear lots of people saying they would hunt but they don’t like the taste of the meat, or that they just don’t know how to cook it. Likewise, whenever we serve game to friends and family, we get lots of surprised comments about how flavorful and good the meat is, not at all gamey as they expected.

In part one of this series I talked about the differences between beef and venison and how that affects the tenderness and juiciness of the meat.  It is important to know that wild game is not beef and therefore must be prepared differently and will taste different.  Today I’m going to talk about processing wild game and its relationship to the “gamey” flavor that venison often has a bad reputation for.  This is not a how-to, but rather an overview of the entire process.

What does venison taste like?

Deer, elk and antelope (as well as other game animals) each have a distinct flavor.  Antelope (pronghorn) and whitetail tend to have a bolder, wilder flavor, while elk tends to be less so.  Yak and bison taste the mildest, most similar to beef but slightly sweeter.  For the purposes of this post, I’m going to refer to them all as venison, despite the differences between the animals.  Mule deer, which is what we most often get in Colorado, is somewhat middle of the road on the wild-flavor scale.

First and foremost, let’s talk about what venison should taste like.  It should taste:

  • fresh
  • richer and more “meaty” than beef
  • bold with a lot of depth
  • of a mild sage or juniper flavor (depending on the animal’s diet)
  • according to some, similar to mutton, but much leaner
  • depending on the species, mildly sweet

Venison should not taste:

  • “off” or rotten
  • pungent
  • bitter
  • overly sweet
  • bland
  • like beef

Venison is darker in color than beef and should not ever smell bad or be tinged green or grey.  It is my opinion that the bad reputation of venison’s “gamey” flavor comes from poor processing habits and the serving of meat that is actually rancid or at least borderline.

What effects flavor:

The key to fresh tasting meat it to get it cool and skinned as fast as possible.  Leaving it hot or leaving the hide on will cause it to rot quickly and leave your meaty tasting quite “pungent” (i.e.: rotten).  This is important whether you plan to butcher the animal yourself or are taking it to a pro.  If you leave the hide on longer than necessary or don’t cool the meat quickly, it will have a bad flavor.

Often I’ve seen hunters leave their meat hanging, skin-on, in the garage to “age”  or “cure” the meat in hopes of making it more tender.  While properly aged meat is delicious, doing it in your attached garage is a very good recipe for rotten deer steaks.  Leaving your deer carcass hanging for days in a tree, barn, pole or garage is not aging it – it is rotting it.  Colorado weather is not conducive to the traditional buck poles of the Great Lakes states.  If you wish to age your venison, take it to a butcher or meat processor where it can be done safely, in a temperature controlled environment.

Additionally, avoid meat from trophy hunters, and avoid becoming one yourself.  Trophy hunters are usually after great big, hormone-filled bucks in the middle of the rut (mating season).  All those male deer hormones add a distinct musky flavor to the meat.  Does and cows taste much cleaner and nicer than bulls and bucks depending on when the animals are harvested.  Also, meat harvested during archery season in Colorado is going to tend to be more mild than meat from rifle season, because the archery season is before the rut.

Field dressing and cooling your meat:

Hunting is a tradition that is passed on from generation to generation, and so is processing meat.  “Processing” is a nice term for cutting and preparing an animal for consumption, including gutting, skinning and cleaning (a.k.a. field dressing).  While you can learn to do this on your own, I’ve found that most hunters have learned to do this in the field, taught by an experienced relative or friend.  Rick learned from his grandfather and uncles.

This means that if the teacher has bad meat processing habits, he (or she) will most likely be passing them on to the student.  And this leads to bad tasting meat.

Please, please, if you are not confident in your ability or the ability of your teacher to effectively process your animal, find someone who’s game tastes delicious to teach you.  Ask tons of questions, or just take it to a professional processor.

Packing out meat using game bags.

The real work of hunting is not in the tracking down and killing of the animal.  That is only where the work begins.  After harvesting an animal that is fully grown, looks healthy and is of the sex you have a license for (preferably with a shot through the heart and lungs), you should immediately open it up and gut it.

Be very careful during this process not to nick the intestines with your knife or let any of the digestive juices or fecal matter touch the meat.  Take your time and have someone who has more experience show you how to do this in the field.  Any meat that has come into contact with fecal matter or digestive juices is essentially ruined. 

Once gutted, your next move should be to remove the hide.  Take care to keep the hair and any dirt or debris off of the meat.  If it is a large animal, like an elk, you will need to quarter it to pack the meat out.  Put the skinned meat in game bags.  Game bags are inexpensive, protect your meat, and allow you to remove the hide in the field so that the meat can cool as quickly as possible.  They are well worth the small investment for the taste of your meat.

If you harvest a smaller animal such as a pronghorn or whitetail and wish to drag it from the field without quartering it, leave the hide on until you get it to a point where you can skin it as quickly as possible with out the meat becoming dirty. In either case, get the animal in coolers with ice as quickly as you can.  Keep coolers and ice in your vehicle.  If your animal is whole, saw though the sternum, pack the cavity with ice jugs and wrap it in a tarp until you can quarter it.

If it is possible, you should begin butchering the meat as soon as you are back to your work area.  If you must leave your animal overnight before you can butcher it, quarter it (if you didn’t before) and put the quarters in coolers with plenty of fresh ice jugs to get/keep it cool.

Some hunters will hang the meat, propping the body cavity open to allow it to cool overnight.  We have seen this done in the Colorado mountains where it gets below freezing each night during hunting season.  I don’t recommend this method of cooling because temperatures are not certain and can easily fluctuate, promoting bacteria growth on your meat.  If you choose to do it, make sure to quarter the animal and get it over ice first thing in the morning; sunny Colorado daytime temps can get well above 40 degrees even in late season hunts.  Also be aware that leaving your venison hanging overnight will invite bears and other predators to your camp.  Rick’s uncles have lost entire sides of an animal and incurred lots of damage to barn doors that way.

Butchering game:
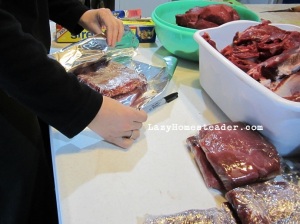
Double-wrap and label your meat.

Before you begin butcher your animal, thoroughly wash your hands, knives, cutting surfaces, counters or tables and any other tools you might be using.  Butchering an entire animal is a big, messy job that most average kitchens can’t handle.  Many hunters end up using a garage or barn.  If you are among that group (we are), make sure your garage and work surfaces are scrupulously clean.  You are planning on eating this meat.  Don’t give yourself food poisoning.  Also, make sure you can keep the area cold.  Heat will rot your meat.  Dress in layers while you are cutting meat if you have to.  Lastly, make sure your knives are sharp and keep a sharpener handy.

While Rick’s family taught him how to process the animal up to this point, we don’t butcher the meat in the same way he was originally taught.  I cook quite differently than Rick’s mother and grandmother, so I prefer our meat in different cuts and thicknesses than those Rick used to bring home.  In this way, we are still learning to butcher meat ourselves.  We have read lots of books and studied diagrams, and still most of our cuts of meat (besides the back-straps and tenderloin) get the general label of “steak.”  Because of this, I’m not going to give specifics on butchering.  But here are the the points that I feel are important to share:

  • Keep everything clean.
  • Keep everything cold (40 degrees or lower).
  • Cut your steaks a little thicker than you think you should.
  • Throw away any blood-shot or bruised meat, typically around the wound.
  • Remove the silver skin (the white, inedible connective tissue over the meat).  It is easier to do it now than after you cook it.
  • Set odd bits and small pieces aside for hamburger or sausage.
  • Package your meat into serving sizes for your family.
  • Vacuum seal or double wrap your meat to prevent freezer burn.
  • Label your packages clearly with the date.

Finally, when butchering, don’t dawdle.  You are working against the clock to get your meat in the freezer before it rots.  If you need to take an extra day off of work, do it.  Don’t rush through the work, you must be careful not to cut yourself, but don’t put off the butchering.  It takes priority over other activities.

If you get the feeling that I’m blaming the negative connotations of “gamey” meat on it being rotten, you are right.  I stand firmly in the camp that if the meat tastes bad, it is bad.  By getting the meat skinned and cooled as quickly as possible, and by keeping it cold while butchering it, Rick and I have enjoyed much better tasting meat.  Not “gamey” at all, just fresh, wild and delicious.  The time invested after the animal is down is well worth it.  And enjoying the meat is the whole point.

If you’ve enjoyed what I’ve posted about cooking wild game so far, please subscribe to have my future posts shown in your RSS feed or emailed directly to your inbox by using the form in the sidebar at the right.  You can also find me on Facebook.  Thanks for reading.

Categories: Food, Hunting | Tags: , , , , | 16 Comments

The Gamey Taste of Game Meat, Part I

Every so often I publish a blog post either about hunting or with a picture of an elk steak in it.  Usually after this I get at least one or two questions about how to prepare game meat so that it doesn’t taste so “gamey.”  I hear lots of people saying they would hunt but they don’t like the taste of the meat, or that they just don’t know how to cook it. Likewise, whenever we serve game to friends and family, we get lots of surprised comments about how flavorful and good the meat is, not at all gamey as they expected.

Since hunting season is just around the corner for many parts of the country, and since our family mainly eats game meat, I thought I’d share a bit about how we process and cook the meat, and how we deal with the “gaminess” of venison and other meats. Over the next couple of weeks I plan to publish a series of hunting related posts, including recipes for cooking wild game.

Making wild game into a delicious meal was learned through trial and error over the last nine years of cooking and processing game.  We’ve made some discoveries that have really helped us.  When people refer to venison as gamey they are either speaking of the toughness or dryness that often occurs when cooking the meat, the distinctly wild flavor, or both.  It’s a bit backwards but I’m going to talk about cooking game meat first.  This addresses the toughness and dryness of venison.  In part two, I’ll talk about harvesting and processing game and how that directly affects the taste of your meat.

Eye fillet of grass-fed beef.

Eye fillet of grass-fed beef. (Photo credit: Wikipedia)

Venison is not beef.

It might seem obvious, but deer, elk and antelope are all very different from cattle.

When you cook beef, the fat and marbling you should look for when buying a steak keeps the meat moist, tender and flavorful.  A delicious juicy steak depends on it’s fat.  Nicely marbled beef can be tender and choice even cooked past medium.  This is because cattle is mainly fed corn to fatten them up (literally, to fatten them).

If you’ve ever cooked grass-fed beef, you know what I’m talking about.  Grass-fed beef is leaner than conventional corn-fed beef.  Often grass-fed beef is “finished” on corn (meaning the last few weeks of it’s life it gets corn to add in some fat).  And even if it is not, grass-fed beef still has more fat than venison.  Cows are bred to stand around and eat.  Cattle ranchers make an effort to keep their cattle from using their muscles.  Even if not confined, they don’t want them running around.  They want lazy, fat, contented cows.  They want tender muscle.  1,400 pounds of well-marbled, tender muscle.

We all know a muscle that is exercised gets harder, tougher, stronger.

Elk fillet, same cut as beef shown above.

Deer (and certainly antelope) don’t just stand around all day filling their stomachs.  They live their lives using their muscles.  They have to keep on the move, running and jumping, staying away from predators.  They have to search out water and food.  Their food is not usually a lush field of grass or corn (unless they are Nebraskan whitetail).  It’s often patches of under-brush, sage and other soft-wooded plants.  Deer eat twigs and bark and shoots.  They are nearly fat-free beings, trim at 150 (or perhaps 400 for an elk) pounds, with the hardened muscles of athletes.

This means you can not cook venison the same way as you cook beef.  While you might like your beef steak medium- to medium-rare, your venison needs to be much closer to rare, else it becomes shoe leather.  It generally should not be cooked well-done or it will be ruined, dry and tough.

Likewise, grouse, pheasant and duck are not chickens.  You must add fat when cooking grouse and pheasant.  Duck is an entirely different bird and it’s breasts can be treated as red meat, cooked to medium-rare or medium.

How to cook wild game:

To start with, use thick cuts of meat.  If you get your game processed by a butcher, ask them to cut your steaks an inch thick or thicker.  Or if you process your meat yourself, use a ruler or make yourself a template when cutting, so your steaks don’t end up too thin.  The idea here is to preserve moisture as much as possible and not over-cook the meat.  Deer and elk steaks are going to be smaller than beef steaks anyway, so if your steaks are thicker, you have more leeway with this.  Remember, you can always cut your meat thinner if you need to later, or for other uses as you get used to cooking your game.

Venison greatly benefits from a marinade.  Most of the time we, at the very least, drizzle our elk, deer or antelope steaks with olive oil and let them sit in it for 20 minutes to half an hour before we cook them.  Olive oil, crushed garlic and thyme is a great, simple combination.

Before cooking we also add fat to the pan (or grill).  Heat your pan and add a bit more olive oil.  Then cook the steak, flipping once, being careful not to over-cook it.  Remember that venison is smaller and less forgiving than beef, so keep a close eye.

Bacon grease and lard are delicious, traditional ways to add fat to your venison.  A lard-seared elk steak, to die for.  Onions sauteed in bacon grease,  the perfect base for a venison stew.  Or keep it simple with olive oil.

After cooking, let your venison steaks rest for up to ten minutes, covered, before serving.

Notice that I didn’t mention salt?  This is because salt draws moisture from meat.  When cooking venison, salt should be added just before serving.

Important to remember here is that you can’t just take a beef recipe and make it into a venison recipe without accounting for the leanness of the meat.  You want to do your utmost to preserve the meat’s juices and moisture.

If you enjoy stir-fry and fajitas, I recommend using a flank-type steak, cooked whole to medium-rare and then thinly slicing.  Only add the sliced steak into the pan for the last few seconds (if at all).

Check out websites like Field and Stream’s The Wild Chef blog or Hunter-Angler-Gardener-Cook for lots of delicious, trusted game recipes.

If you’ve enjoyed what I’ve posted about cooking wild game so far, please subscribe to have my future posts shown in your RSS feed or emailed directly to your inbox by using the form in the sidebar at the right.  Thanks for reading.

Categories: Food, Hunting, Recipes | Tags: , , , , | 27 Comments

How I Do it All

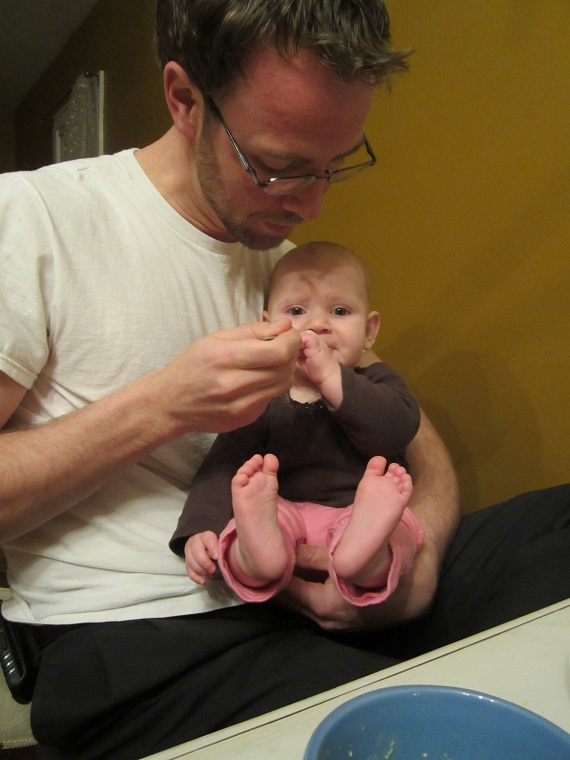
A lot of people ask me all kinds of questions about what we do around here on the Schell Urban Homestead.  The question I get asked the most though is, hands down, “With three kids, how in the world do you do it all?”  The answer is pretty simple… I have a strong partner:

Happy Anniversary, Rick.  Nine years seems like a great start.

Categories: Hunting | Tags: , , , , | 10 Comments

Blog at WordPress.com.