Since last week I posted a tutorial for sewing a homemade garden gnome costume, I thought I’d share how I made H’s bat costume for this Halloween as well. This costume was also very inexpensive to make, and very easy. It took me about 2 hours total, including trying to keep E distracted from pushing the stitching buttons on the sewing machine and away from the straight pins. Click the pictures for close-up views.
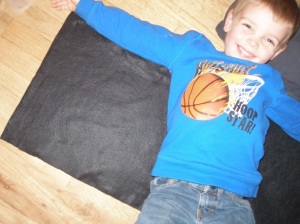
I started with a black jacket from Goodwill ($1.99) and took it with me to the fabric store. Using the jacket as a reference, I bought 3/8 of a yard of black felt ($1.58) . With the material folded in half, I had H lay on the felt with his arm outstretched and used straight pins to mark his wrist, elbow, armpit and waist.
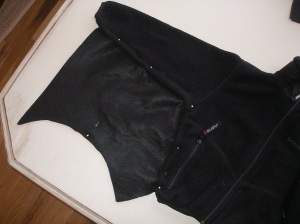
Cut a wing shape using these measurements. You could mark the felt with chalk, make a paper template, or freehand it (I just eyeballed it). With the jacket zipped up, pin felt to the arm and side seam of the jacket. Flip the jacket over and trim away any extra felt. (I love that this jacket has a reflective patch on the back hem – good for trick-or-treating).
Unpin the felt from the jacket, but keep the pin marking the elbow in place. You now have one wing that is two pieces of felt. Use this as a guide to cut another two pieces of felt for the other wing, and mark where the elbow will be on the second wing.
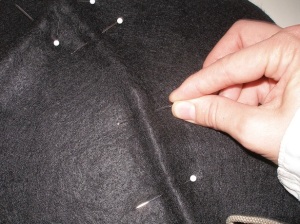
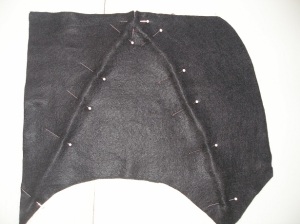
Working with one wing at a time, twist together some pipe cleaners (77 cents for 25). I used seven for each wing. Center the… uh, stem(?) of the pipe cleaners at the pin that marked the elbow, between the two layers of felt. Pin the pipe cleaners in place.
Bend pipe cleaners so that they make lines out to the points of the wings and pin securely between felt pieces.
Top-stitch both pieces of felt together, starting with the outside edges. Then top-stitch on either side of each pipe cleaner. It might be fun to use contrasting thread so you can see the stitching. Repeat this on the second wing.
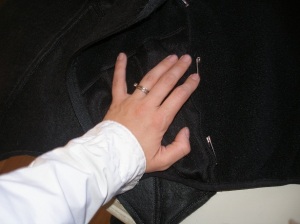
Now you will secure the wings to the jacket. You could sew them in place, use hot glue, or if you want to reuse the jacket later, use safety pins. I used safety pins. I pinned the jacket at the wrist, elbow, armpit, waist and hem. Then I had H try on the jacket, adjusted the wings as needed and added more safety pins.
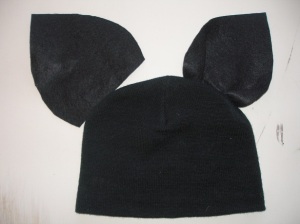
For the bat ears, I cut two pieces of felt in the shape of an ear. Make sure they are big bat ears, not little cat ears! You could do double layers of felt, top-stitched together here too, but I was running out of nap time and patience with Emmett, so mine are only one layer thick. Pin and stitch pleats into each ear. You might want to experiment with one or two pleats, etc.
Pin the ears to a black knit hat ($1.50 new). Flip the hat over a stitch the ears on. Alternatively, you could hot glue or pin the ears in place.
Ta-da! A bat costume for $5.84 plus tax. If you’re keeping tally, that’s $9.53 for two Halloween costumes this year. If you could find a black hoodie at Goodwill instead of a jacket and a hat, that would save you even more.
When the 31st rolls around, H will wear his costume with black pants too. He loves his costume – just what he wanted. What are you doing for Halloween? Do you dress up? Are you making homemade costumes? Carving pumpkins?
Note: Please feel free to share this tutorial on your own blog, just include a link back here! Thanks!








J loves bats– we may be having one at our house, too!
I just love your costume tutorials – so cute!! I’ve linked to your tutorials on my blog. I created a Scarecrow costume for my little one with a felt hat and lots of felt straw. Hopefully, I’ll post a tutorial soon, too!
Thanks April – your blog is super cute and all the tutorials are really handy!
I have been taking my grand children out on mischief night to decorate the homes of my three children who live here in New Jersey. It’s a bonding thing with my grandchildren.
Why didn’t he get Alfred to make his costume? Get it?
Pingback: » Halloween: i costumi da pipistrello fai da te
Pingback: Handmade Halloween – No Sew Pterodactyl Tutorial « The Lazy Homesteader
What an adorable costume! It looks really great. Nice job!
I know it’s a few years later, but I just wanted to tell you that I loved your tutorial. Very helpful in making a costume for my little bat girl. Thanks!
Thanks! I’m glad you liked it!
thank you for this! my son was determined to be a bat for halloween and i was determined not to spend money. $5.99 and a bit of time later, he had a pair of satisfactory bat wings. he’s happy, i’m happy and ready for next year’s challenge 😉 thanks again
Great idea! My daughter says she wants to be a Bat for Halloween. Bat she will be!